Fillout to Creatio Integration: Webhook + Make.com Guide

Experceo · · 6 min read · Updated Apr 28, 2026

Introduction#

Fillout is the only form-builder we cover that supports a direct webhook to Creatio: you can wire form submissions to Lead/Contact/Case creation without using Make.com or any middleware. This guide covers both paths:

  1. Direct webhook, the fastest and simplest. Fillout posts straight to Creatio’s Lead webhook.
  2. Make.com, slower to set up, but adds transformation flexibility (conditional logic, field calculations, multi-step automation, branching).

This documentation is designed for Creatio no-code builders, admins, and citizen developers who want to automate lead creation without writing custom code.

Using a different form tool? Jotform → Creatio (Make.com required, API-key auth) · Typeform → Creatio (Make.com path with UUID field mapping)


Steps Overview#

  • Create your Fillout form.
  • Copy the Creatio webhook URL.
  • Option 1: Configure the webhook directly in Fillout.
  • Option 2: Use Make.com to send data from Fillout to Creatio.

Who This Guide Is For#

  • Creatio citizen developers and no-code creators
  • Teams who want to auto-create Leads in Creatio from Fillout without custom code
  • Admins who prefer Make.com scenarios over custom REST/OData scripts

What you’ll achieve#

  • Auto-create Leads (or Contacts/Cases) in Creatio from any Fillout form
  • Map Fillout fields to Creatio columns without code
  • Run the whole handoff on Creatio’s webhook and a Make.com scenario, with nothing to host yourself

Video Tutorial#

Watch this step-by-step video guide to see the entire integration process in action.

If the embed does not load, you can open it directly here: https://youtu.be/iijGEFwFX7E


1. Create a Fillout Form#

  1. Sign up or log in to Fillout.
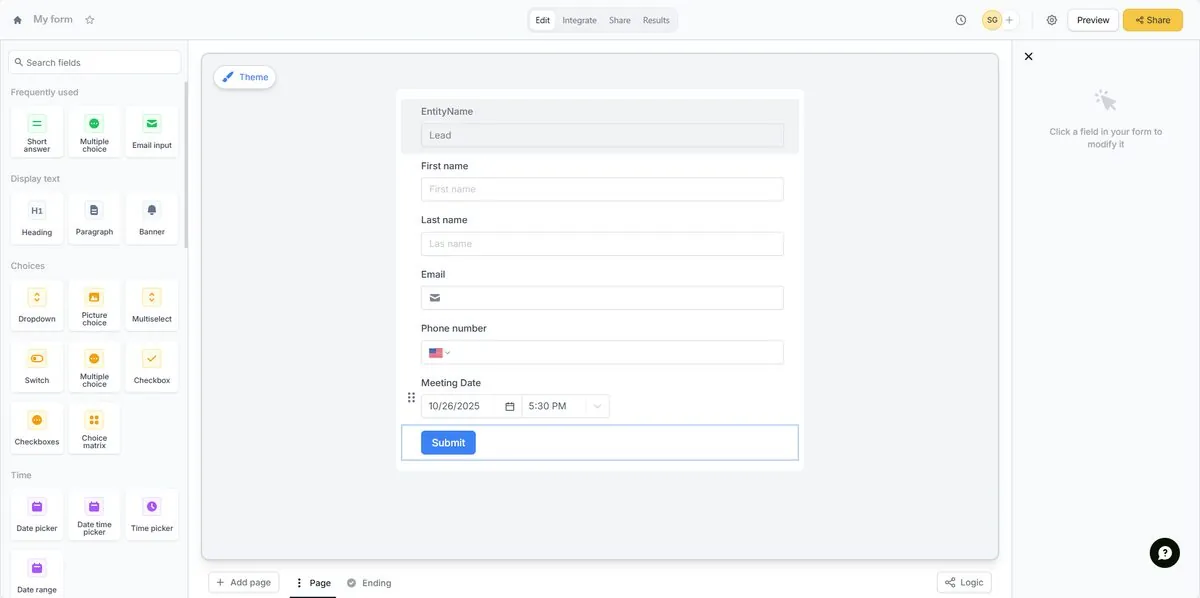
  2. Build your form with all the required fields (Lead Name, Email, Phone, etc.).
  3. Add a hidden text field called EntityName, with default value Lead (or another Creatio object you need).

Fillout form builder with required Lead Name, Email, Phone fields

Hidden EntityName field set to Lead in Fillout form #

2. Get the Webhook URL from Creatio#

To connect Creatio directly with Fillout, you need to obtain the webhook URL.
Similarly, if you connect it through Make, you also need the webhook URL to receive Fillout responses.

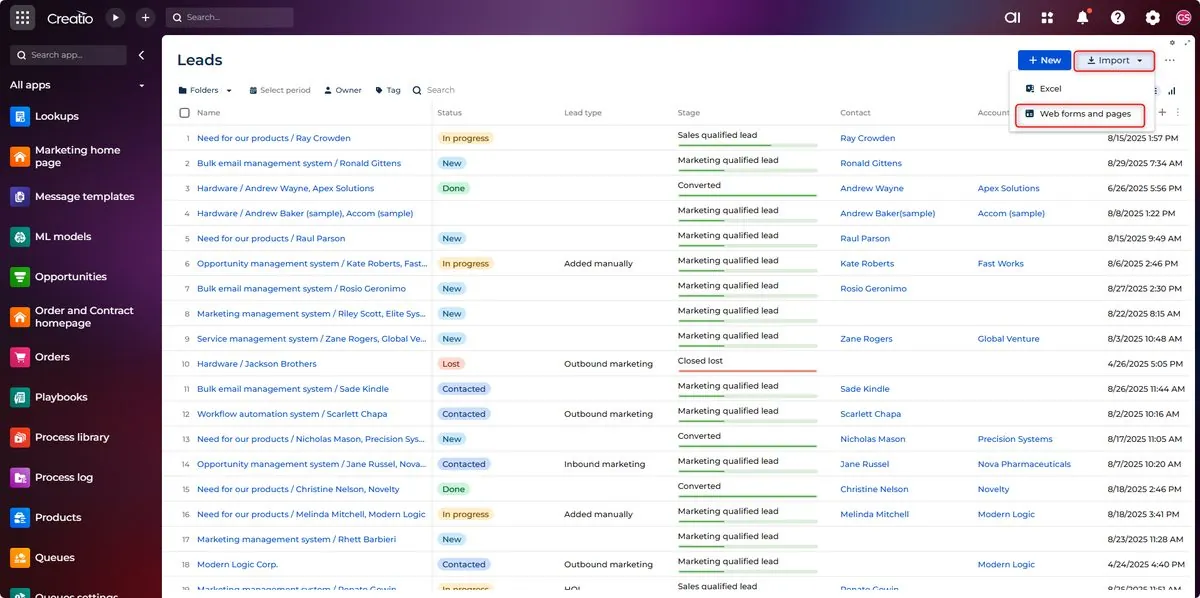
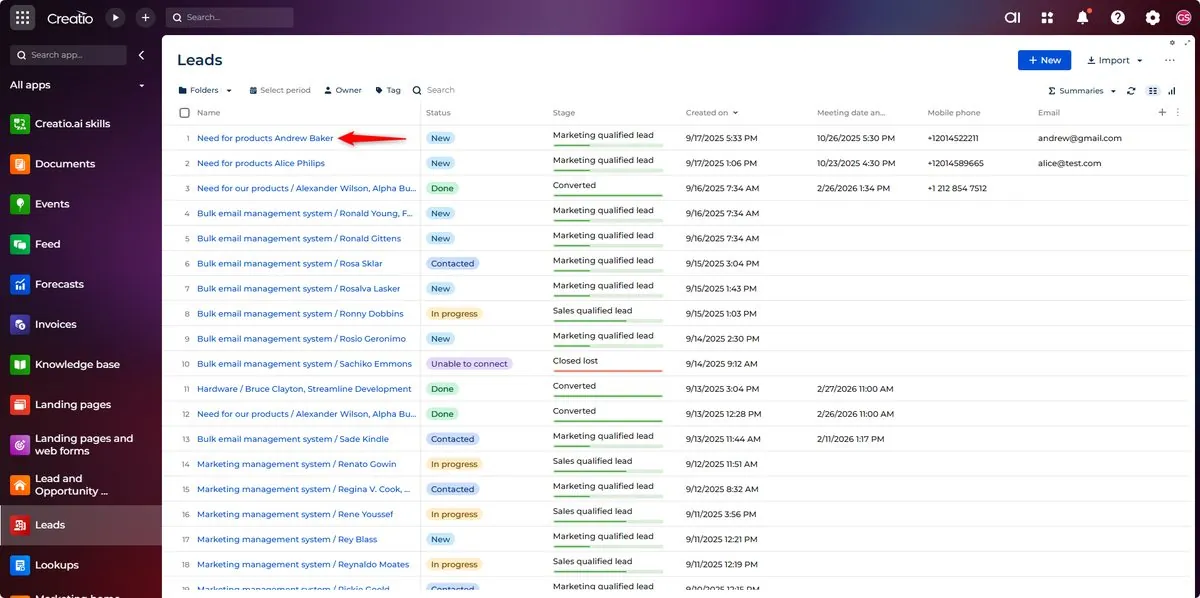
  1. Go to the Lead section in Creatio.

  2. In the top menu, click Import.

  3. From the dropdown, select Web forms and pages.
    Creatio Lead section Import menu with Web forms and pages option

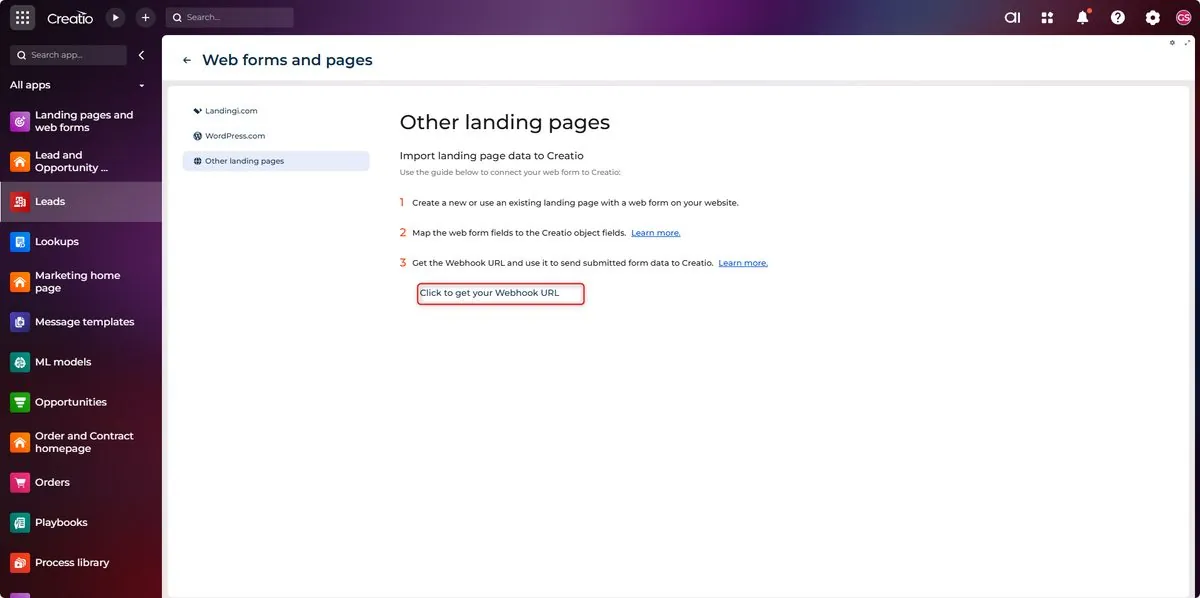
  4. A list of web form integration options will open.

  5. Click Get your webhook URL.
    Creatio web form integrations list with Get your webhook URL button

  6. Copy the generated Webhook URL; this will be used in both direct Fillout setup and Make.


3. Method 1: Configure Webhook in Fillout#

a. Configure the webhook#

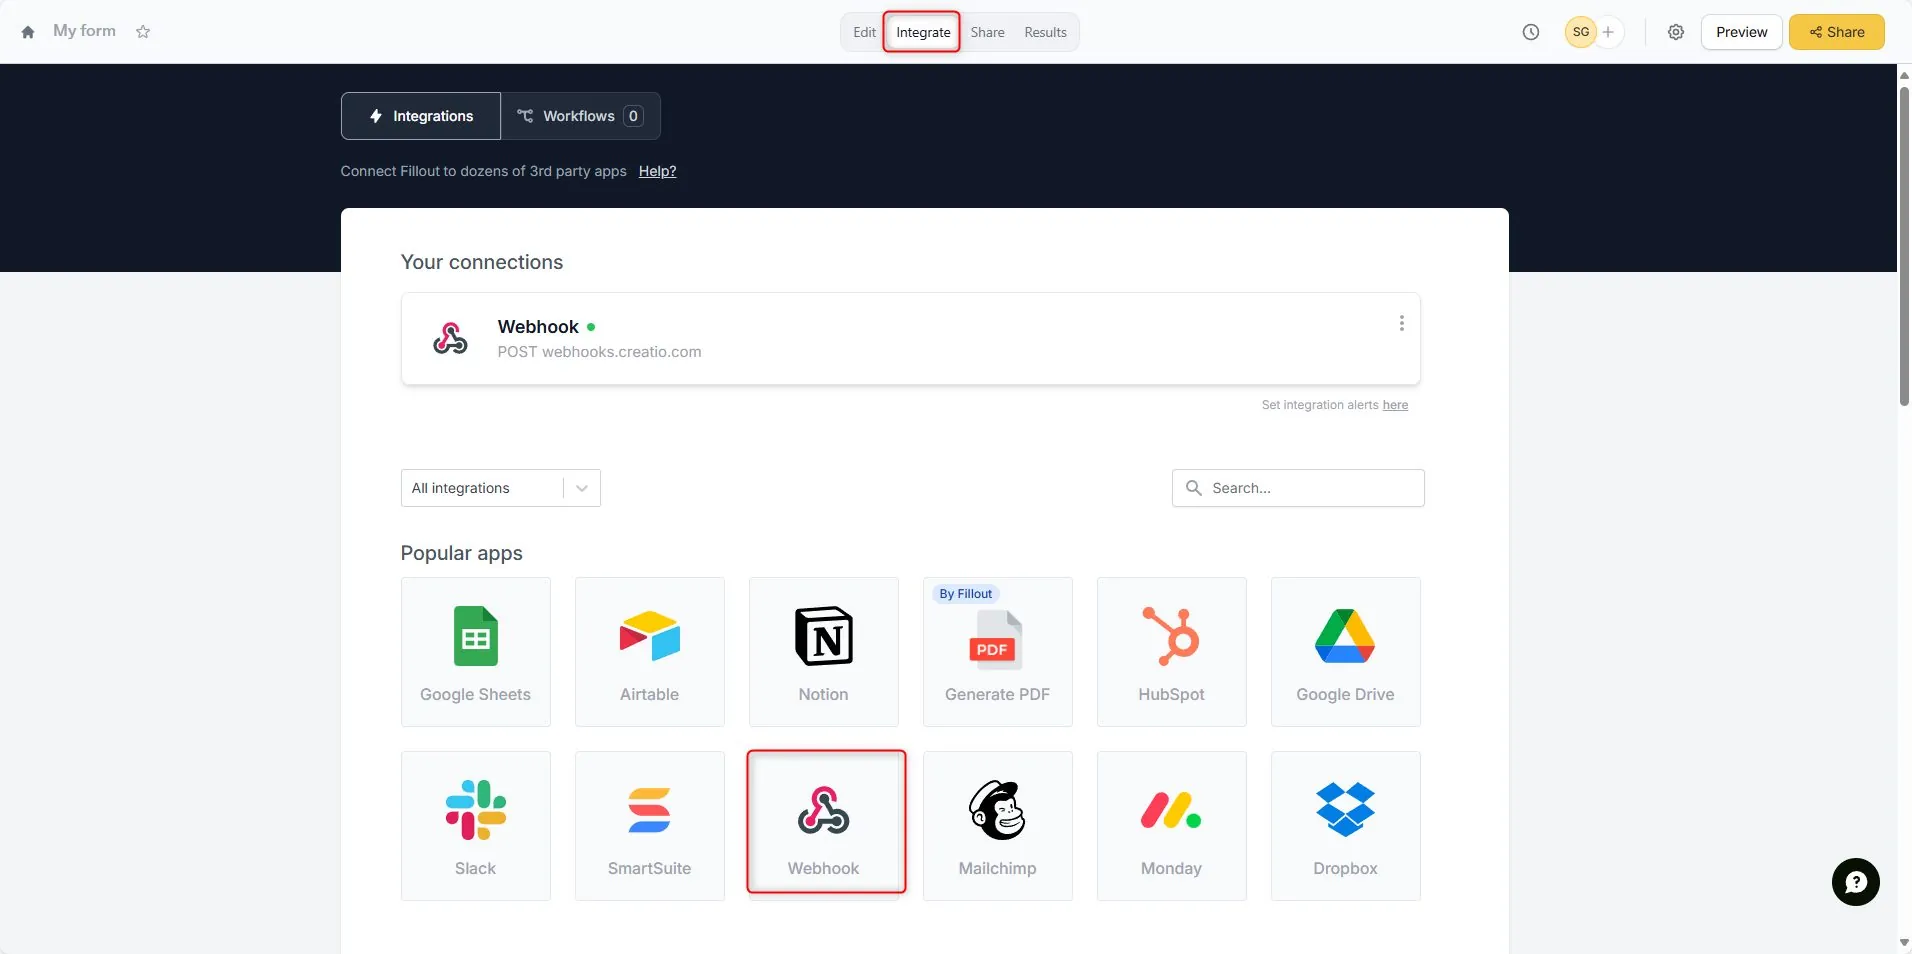
  1. Go to Integrate in Fillout and Click Webhook.
    Fillout Integrate tab with Webhook integration option selected

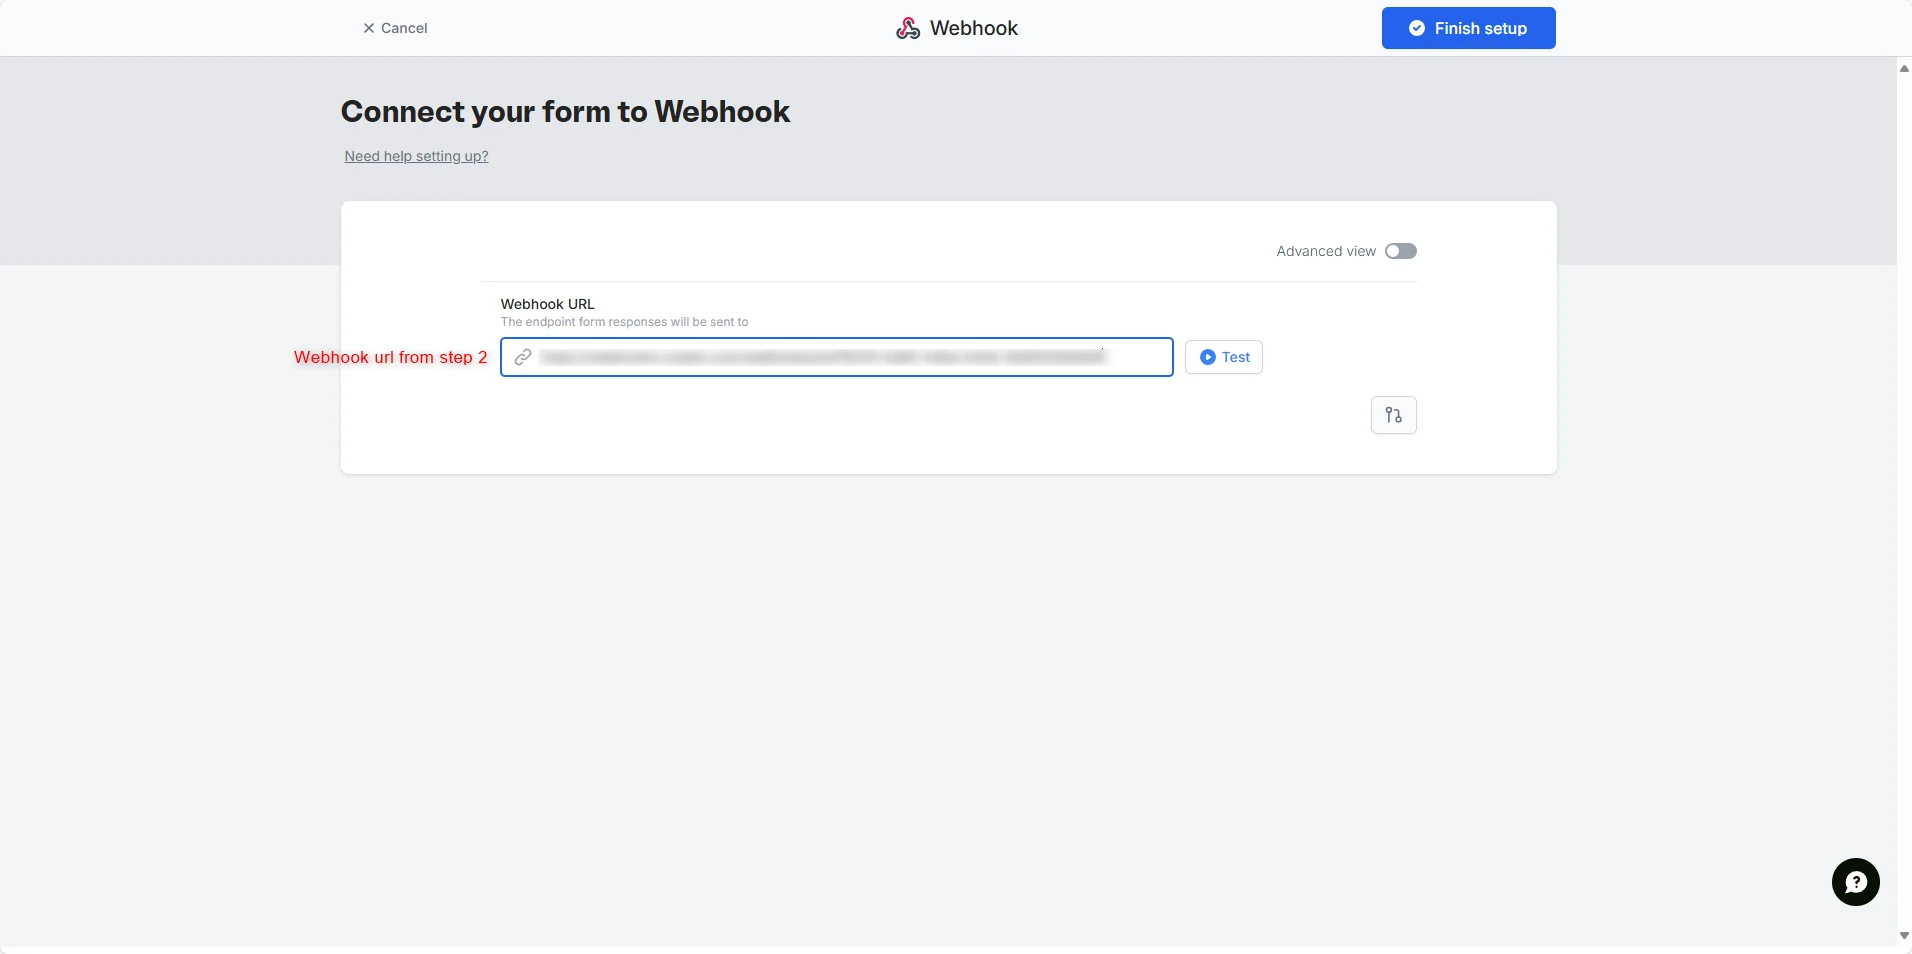
  2. Paste the Creatio webhook URL.
    Creatio webhook URL pasted into Fillout webhook configuration

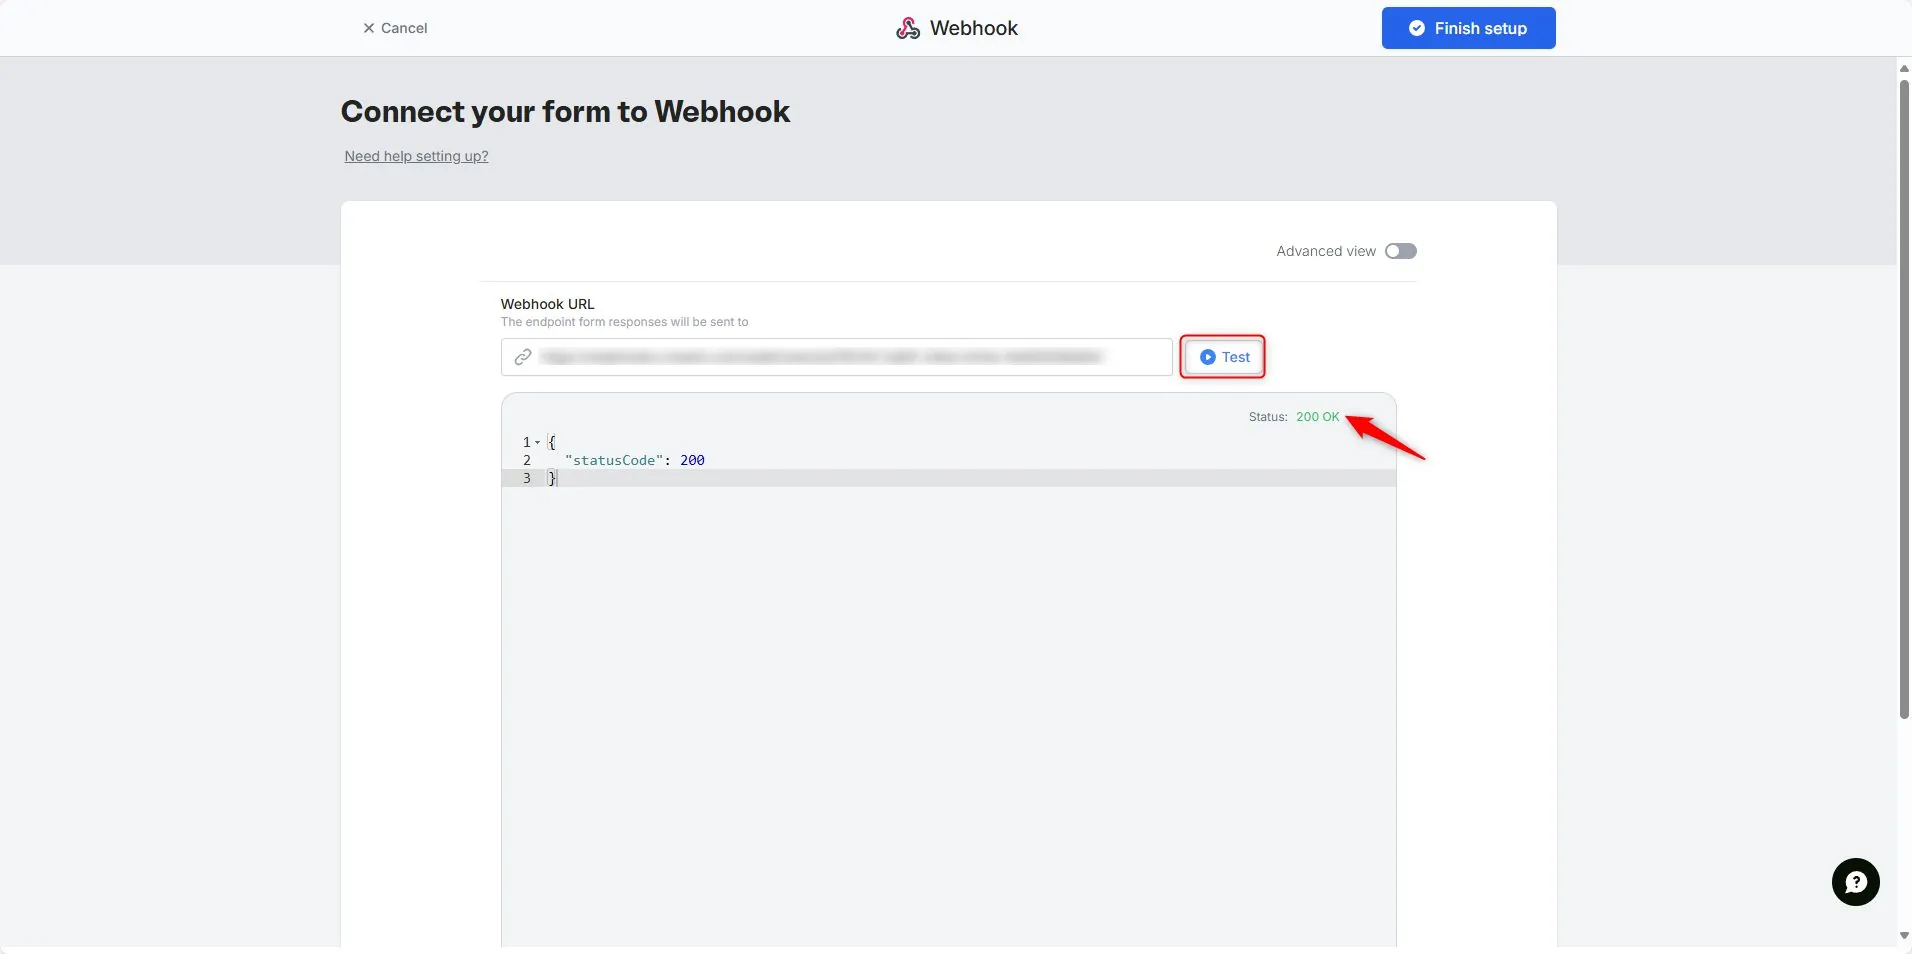
  3. Test it → when successful, click Finish setup.
    Successful Fillout webhook test with Finish setup button

b. Publish and share your form#

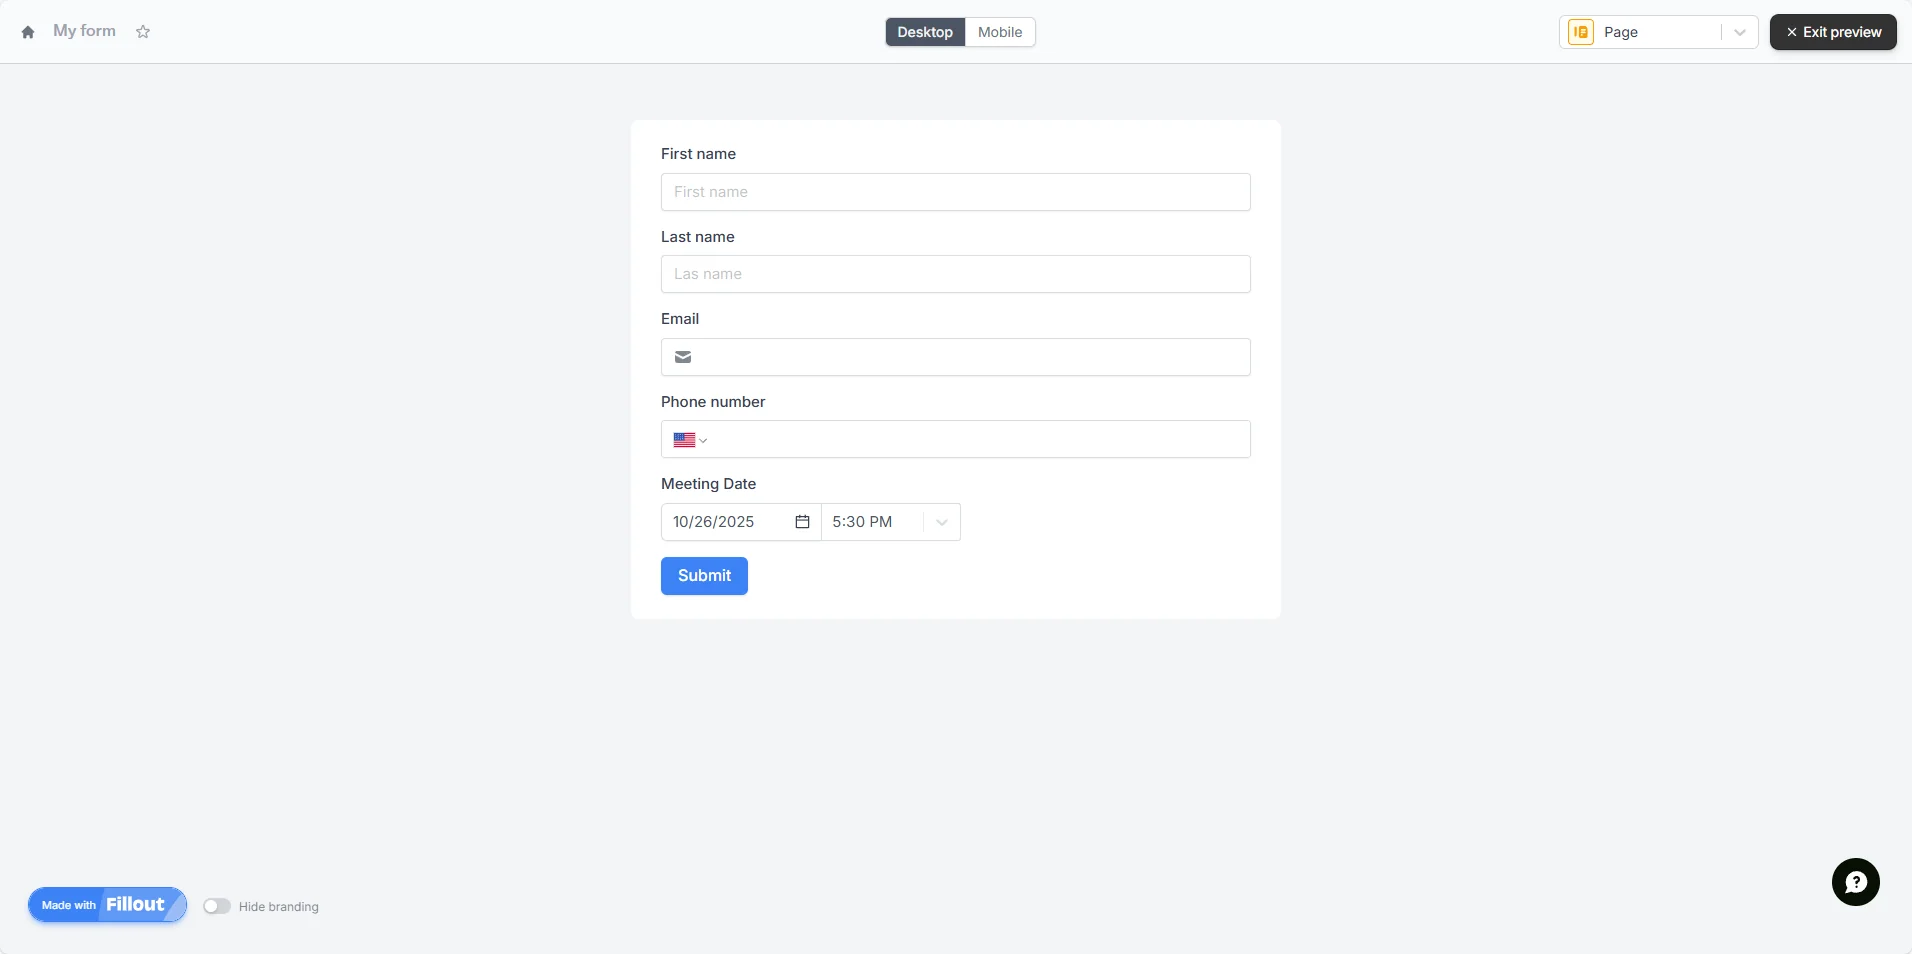
Once tested, publish the form and share the link.

c. Webhook parameters#

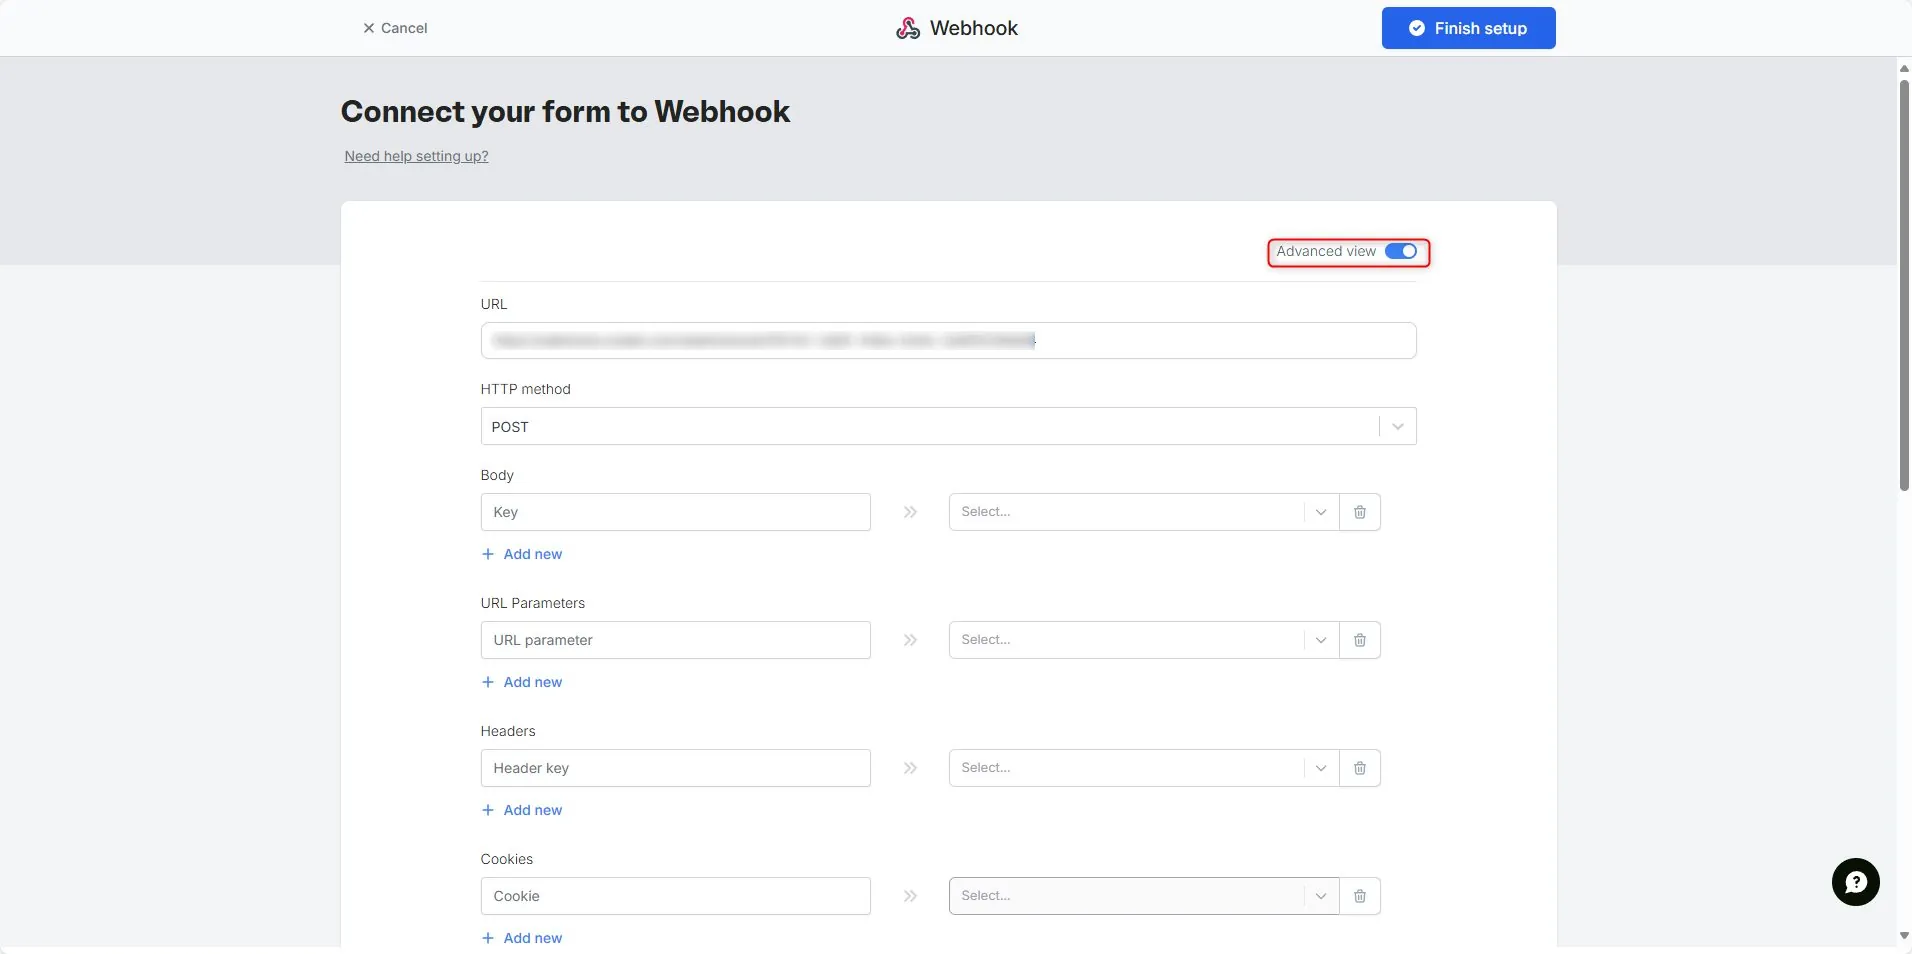
Toggle the Advanced view switch to configure your webhook:
Fillout webhook Advanced view toggle for parameter configuration

  • URL: Creatio webhook URL
  • Method: POST
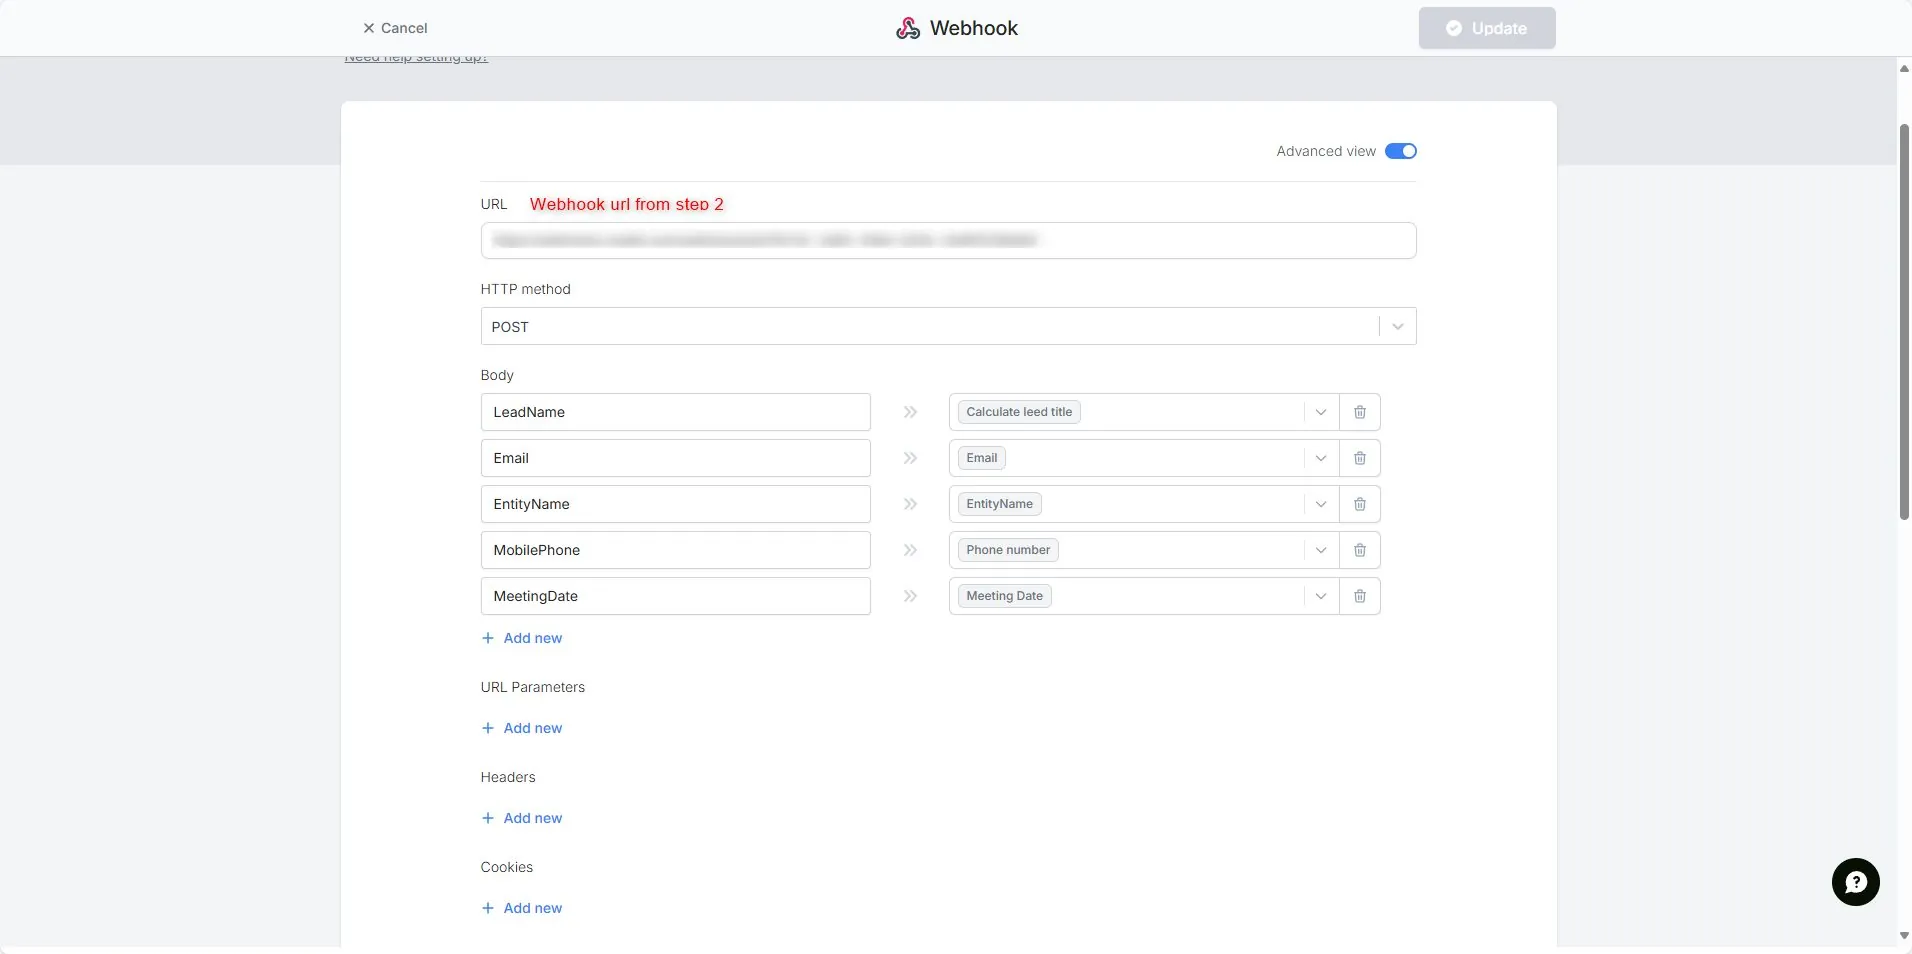
  • Body: Include fields that match Creatio column codes (LeadName, Email, MobilePhone, etc.).
  • Headers/Cookies: optional
    Fillout webhook body fields mapped to Creatio column codes In Fillout’s webhook configuration, you can perform field-level calculations. For example, in this guide, we calculate the Lead Name by concatenating the First Name and Last Name fields. When a user submits the form, a new Lead will automatically appear in Creatio.

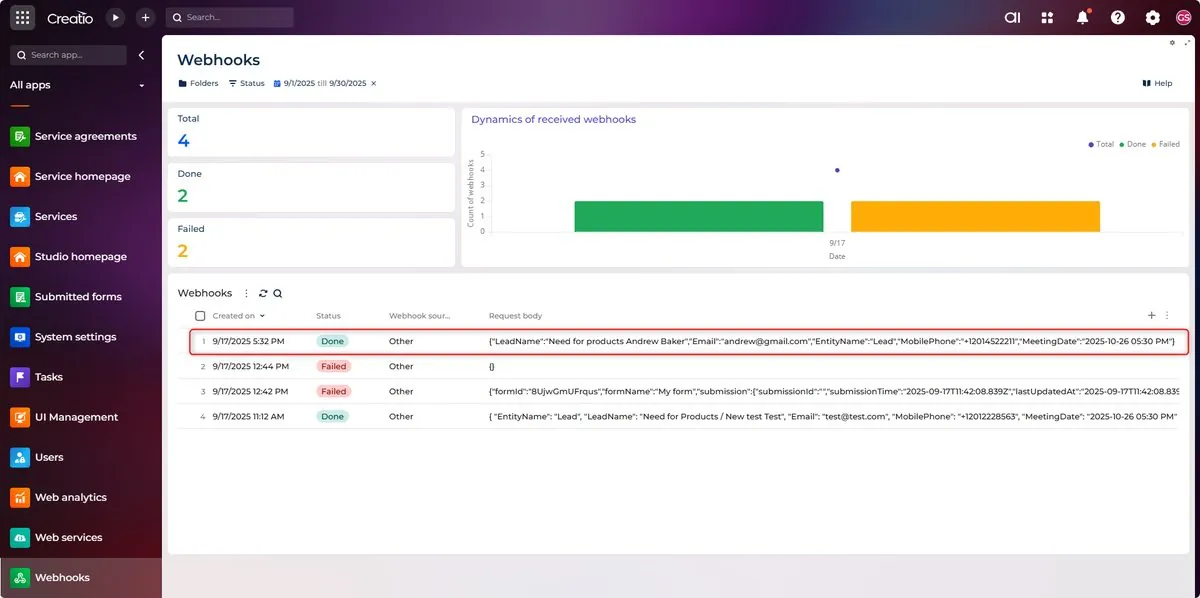
Check if the request is successfully received in Creatio.
Creatio webhook log showing successfully received Fillout submission

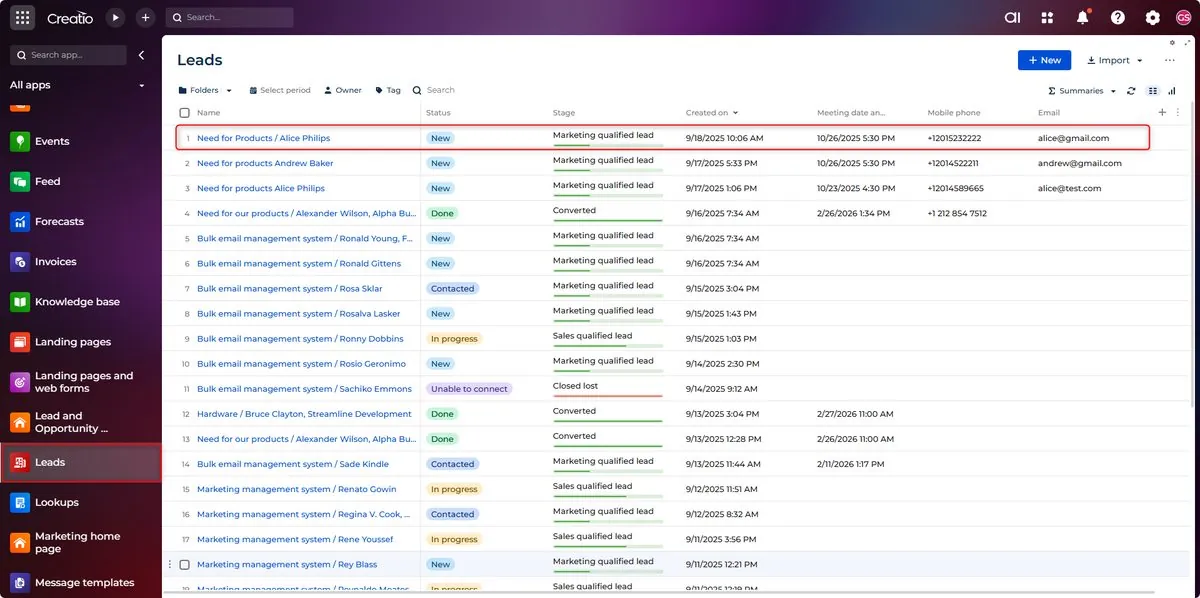
New Lead added
New Lead record automatically created in Creatio Lead section


4. Method 2: Use Make.com for Advanced Automation#

a. Set up your Make account#

  1. Create a Make account at Make.com.
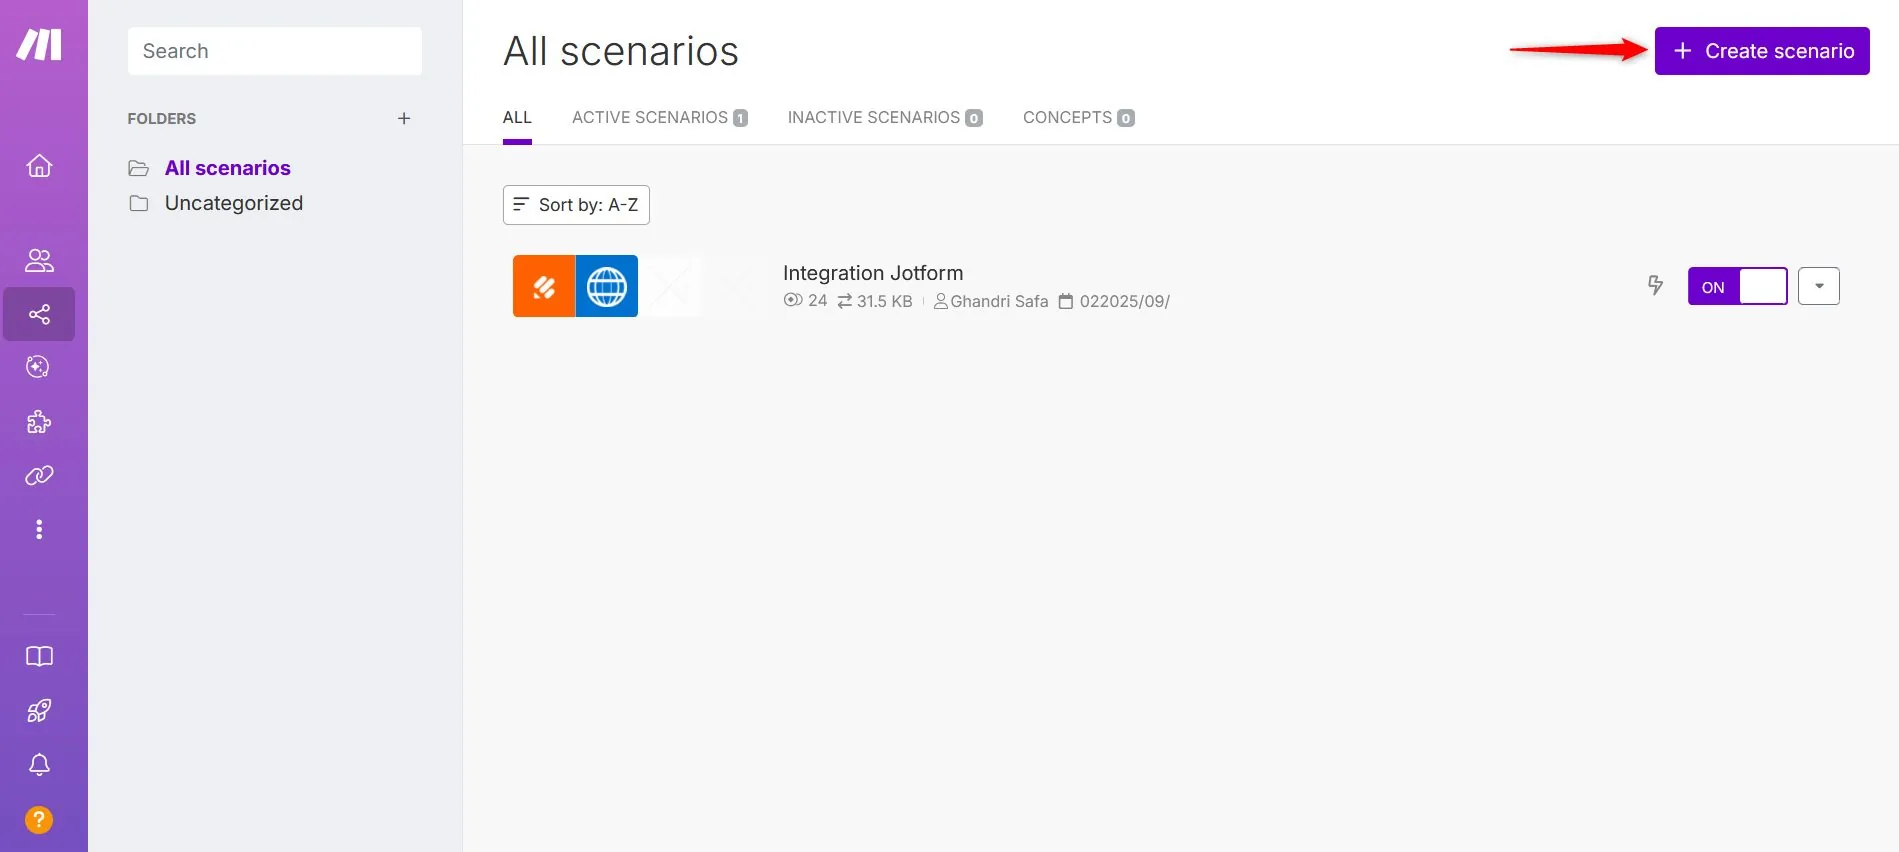
  2. Go to Scenarios → Create a New Scenario.
    Make.com dashboard Create a New Scenario button

b. Configure Fillout module#

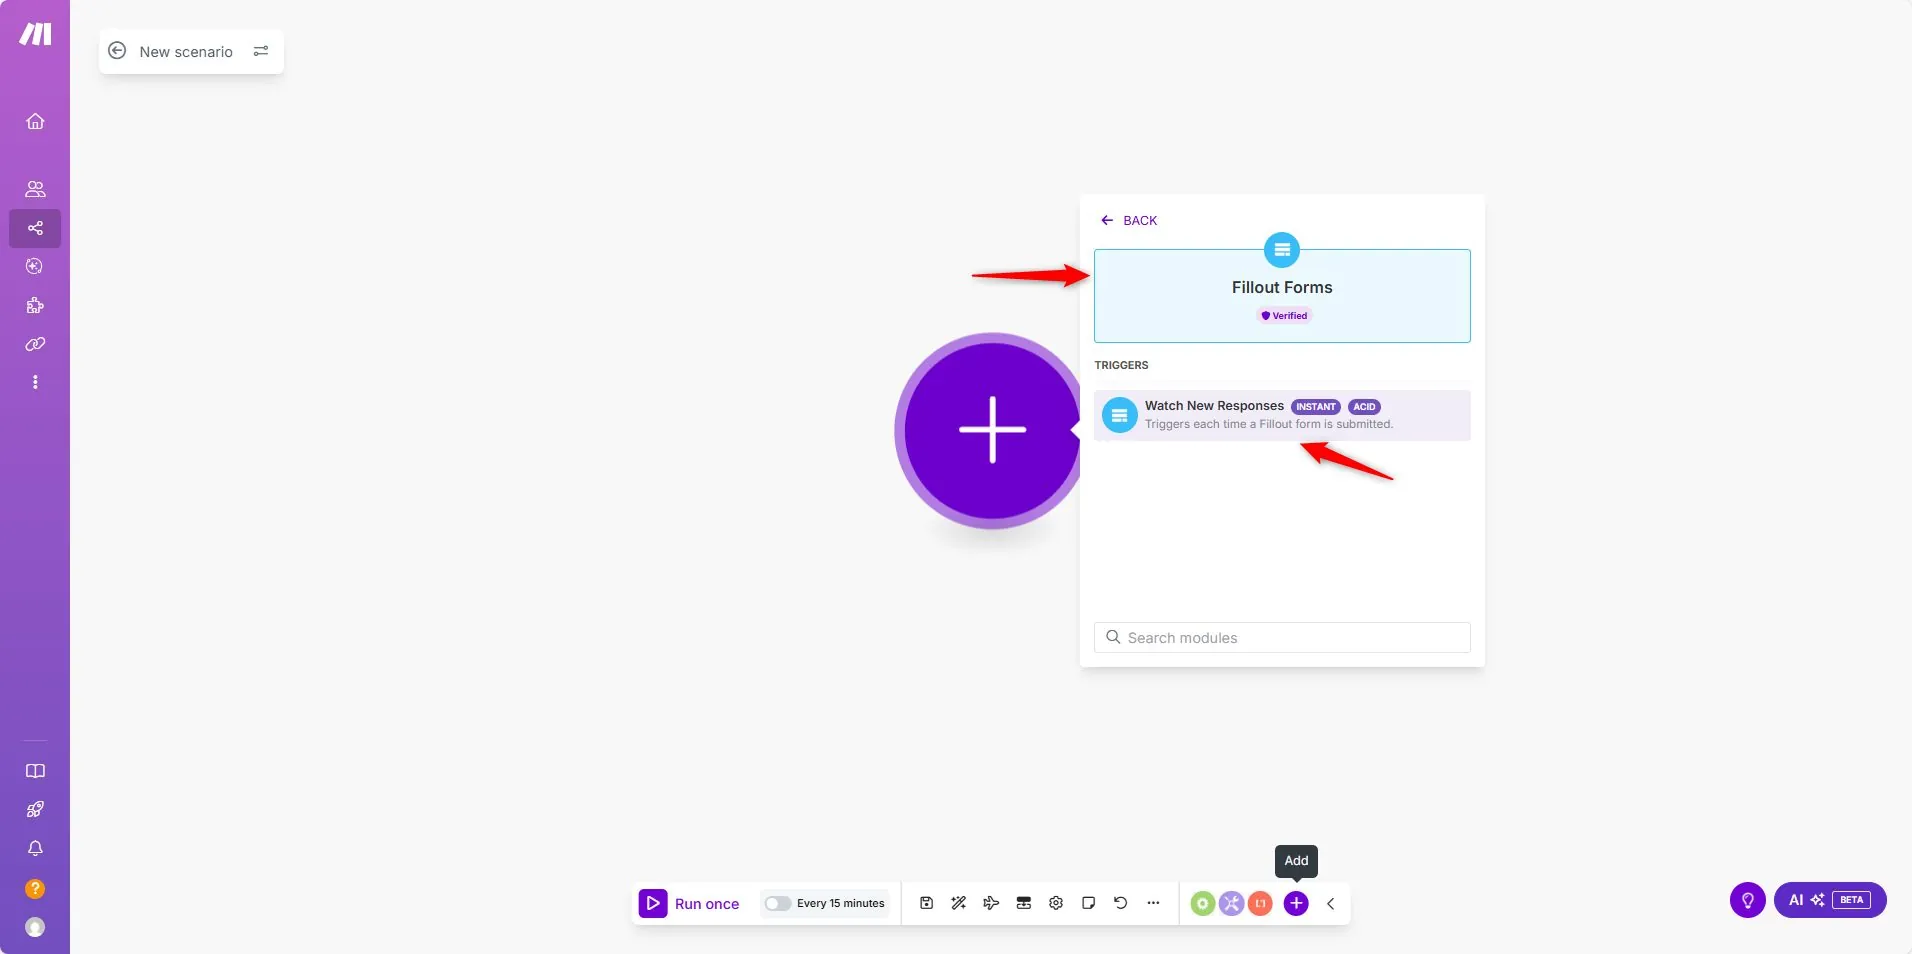
  1. Add your first module: Fillout form → Watch New Responses.

  2. Click the + sign in the center and search for Fillout.

  3. Select Watch New Responses.
    Make.com module picker with Fillout Watch New Responses trigger

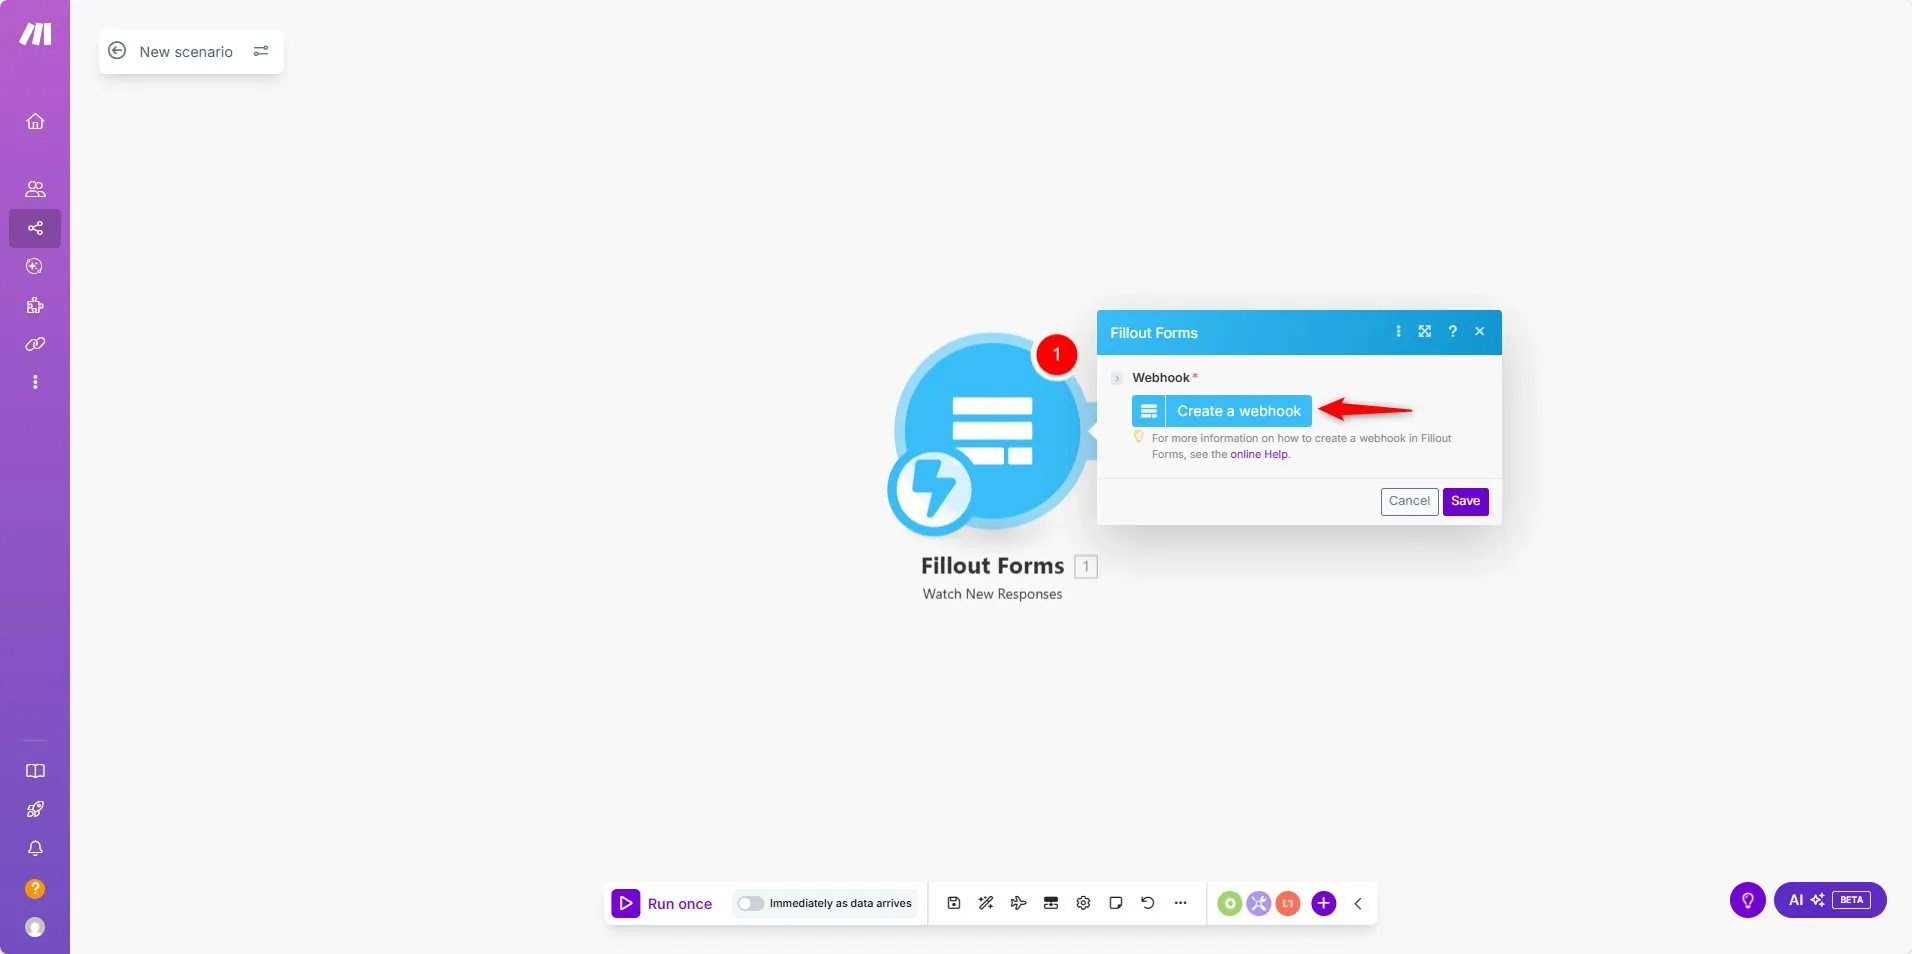
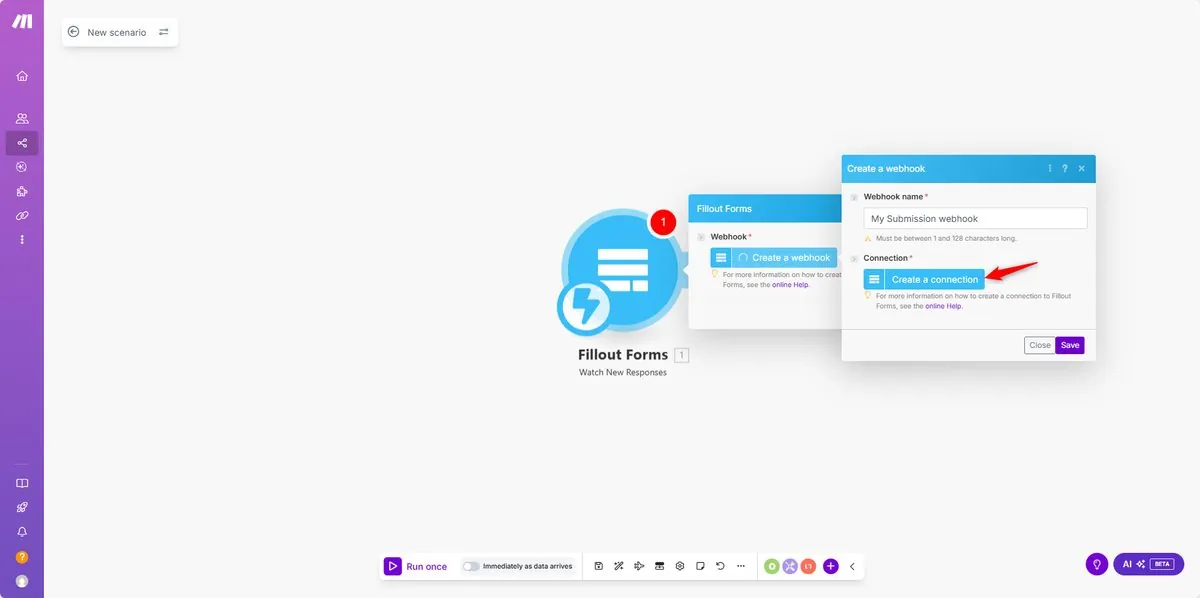
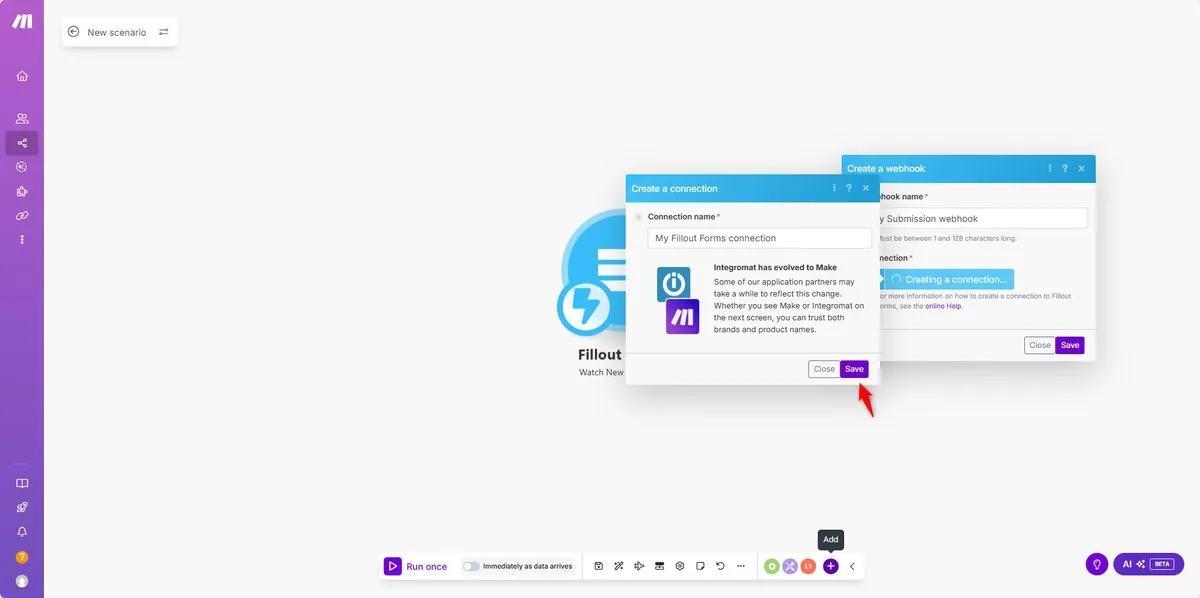
  4. Click Create WebhookCreate a connectionSave.
    Make.com Create Webhook button for Fillout trigger module Make.com Create a connection dialog for Fillout account Make.com Fillout connection settings ready to save

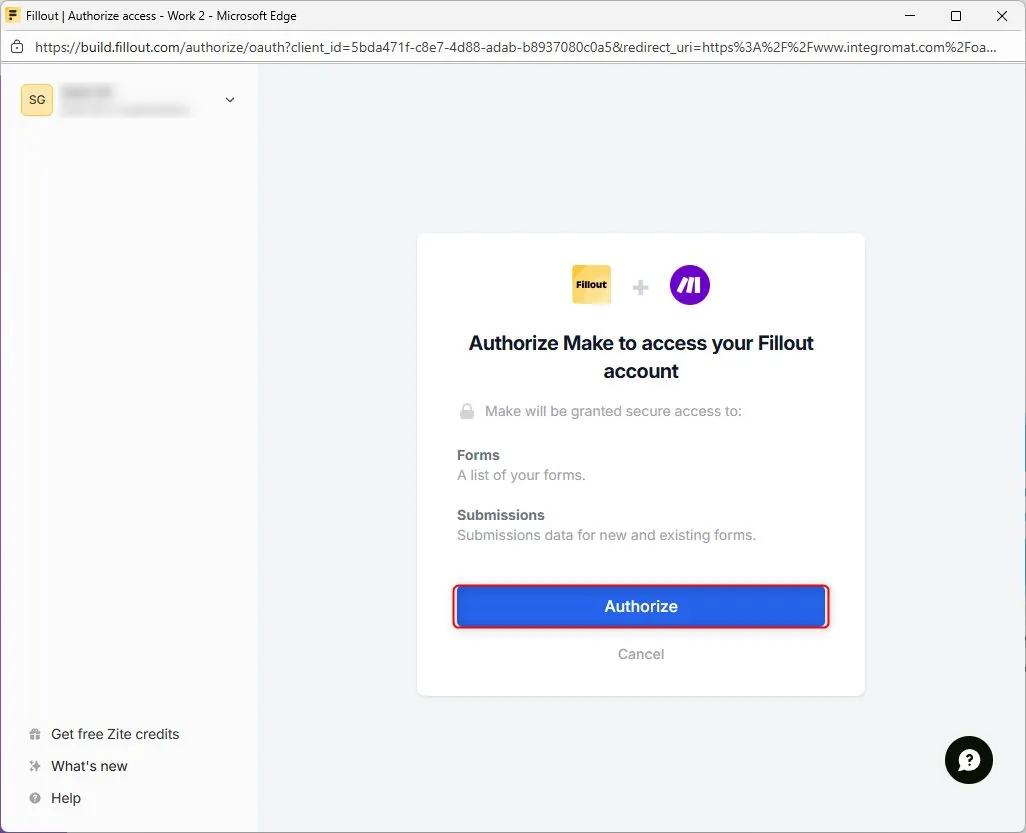
  5. A pop-up will appear prompting you to grant Make access to your Fillout form account. Click Authorise.
    Fillout authorization pop-up granting Make access to account

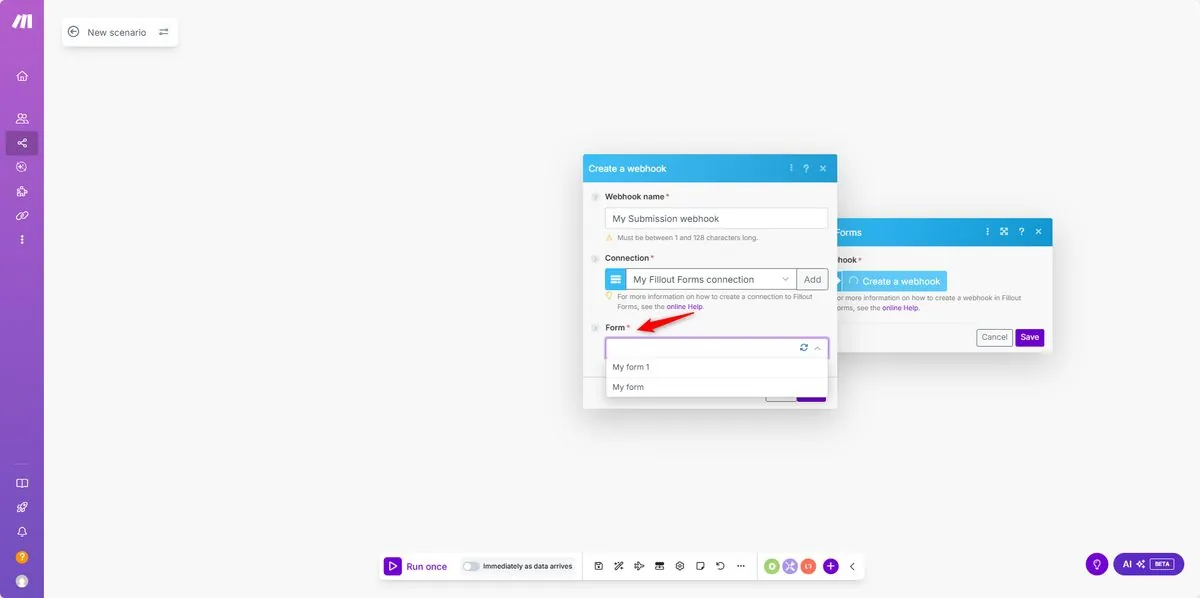
  6. Select your form in the Form ID dropdown → Save.
    Make.com Form ID dropdown selecting the Fillout form trigger

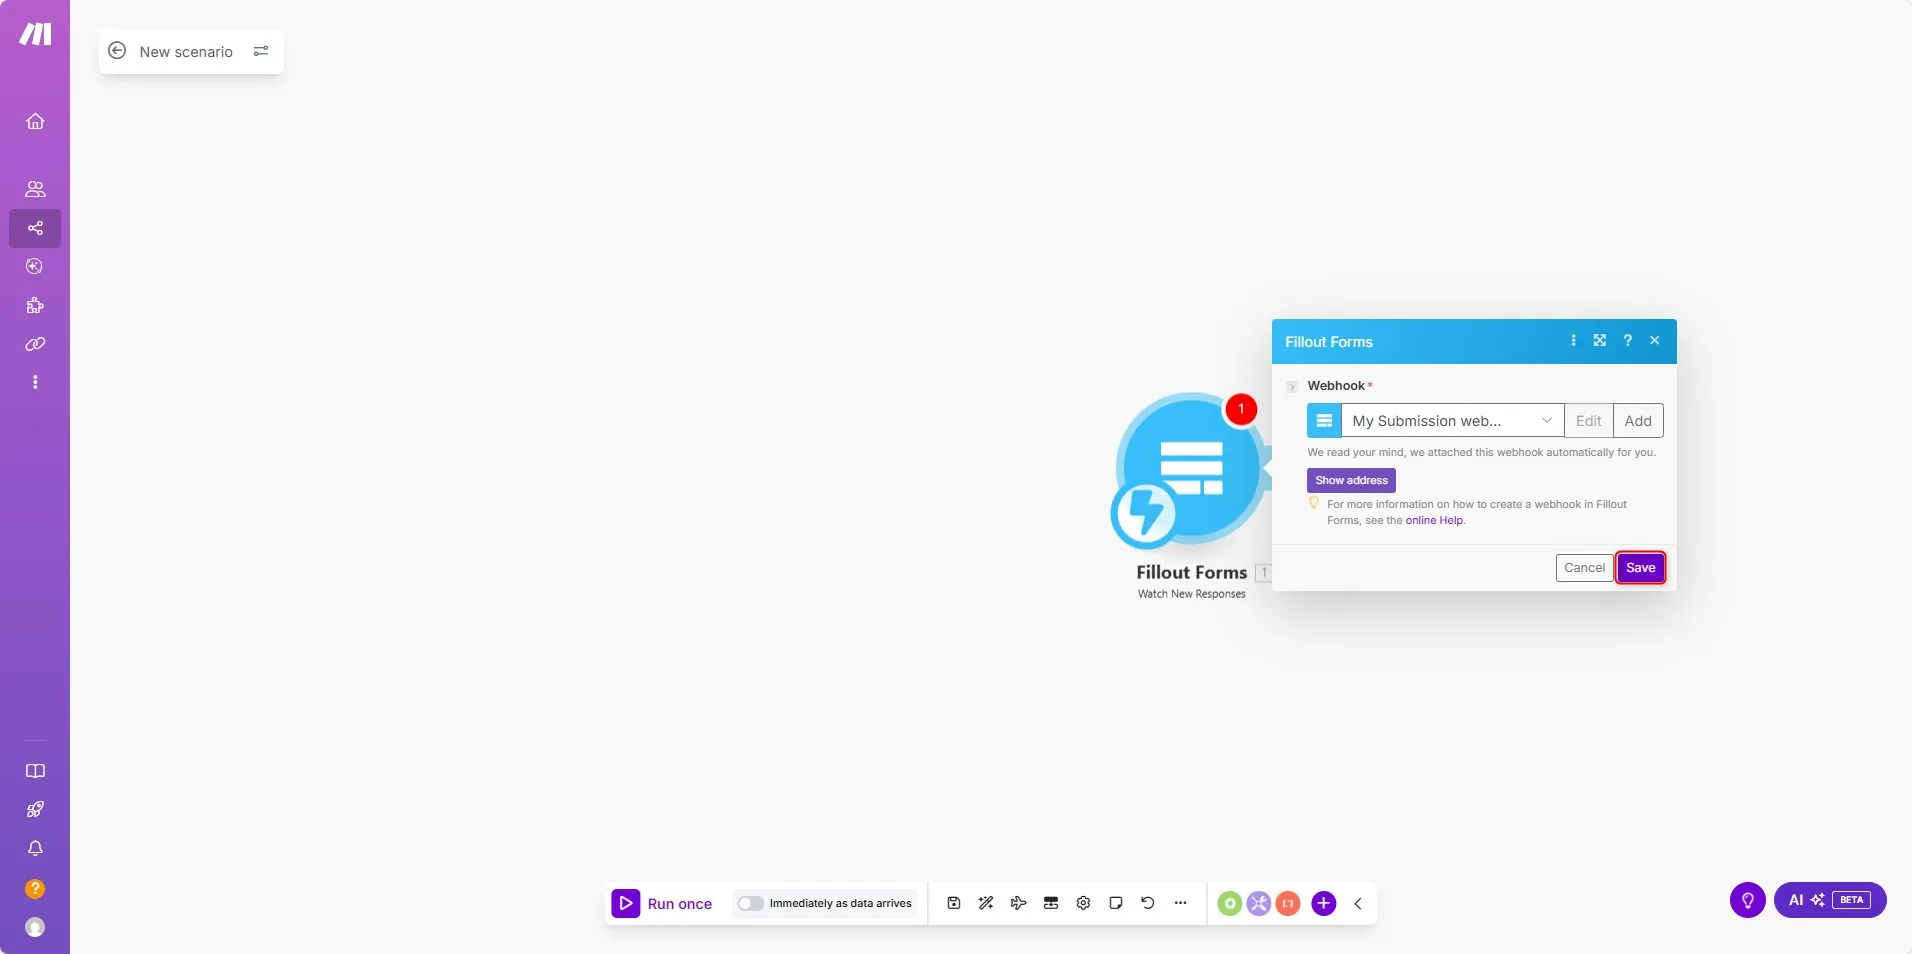
  7. Click the Save button to save your connection settings with Fillout form.
    Make.com Save button confirming Fillout connection settings

c. Connect Make with Creatio#

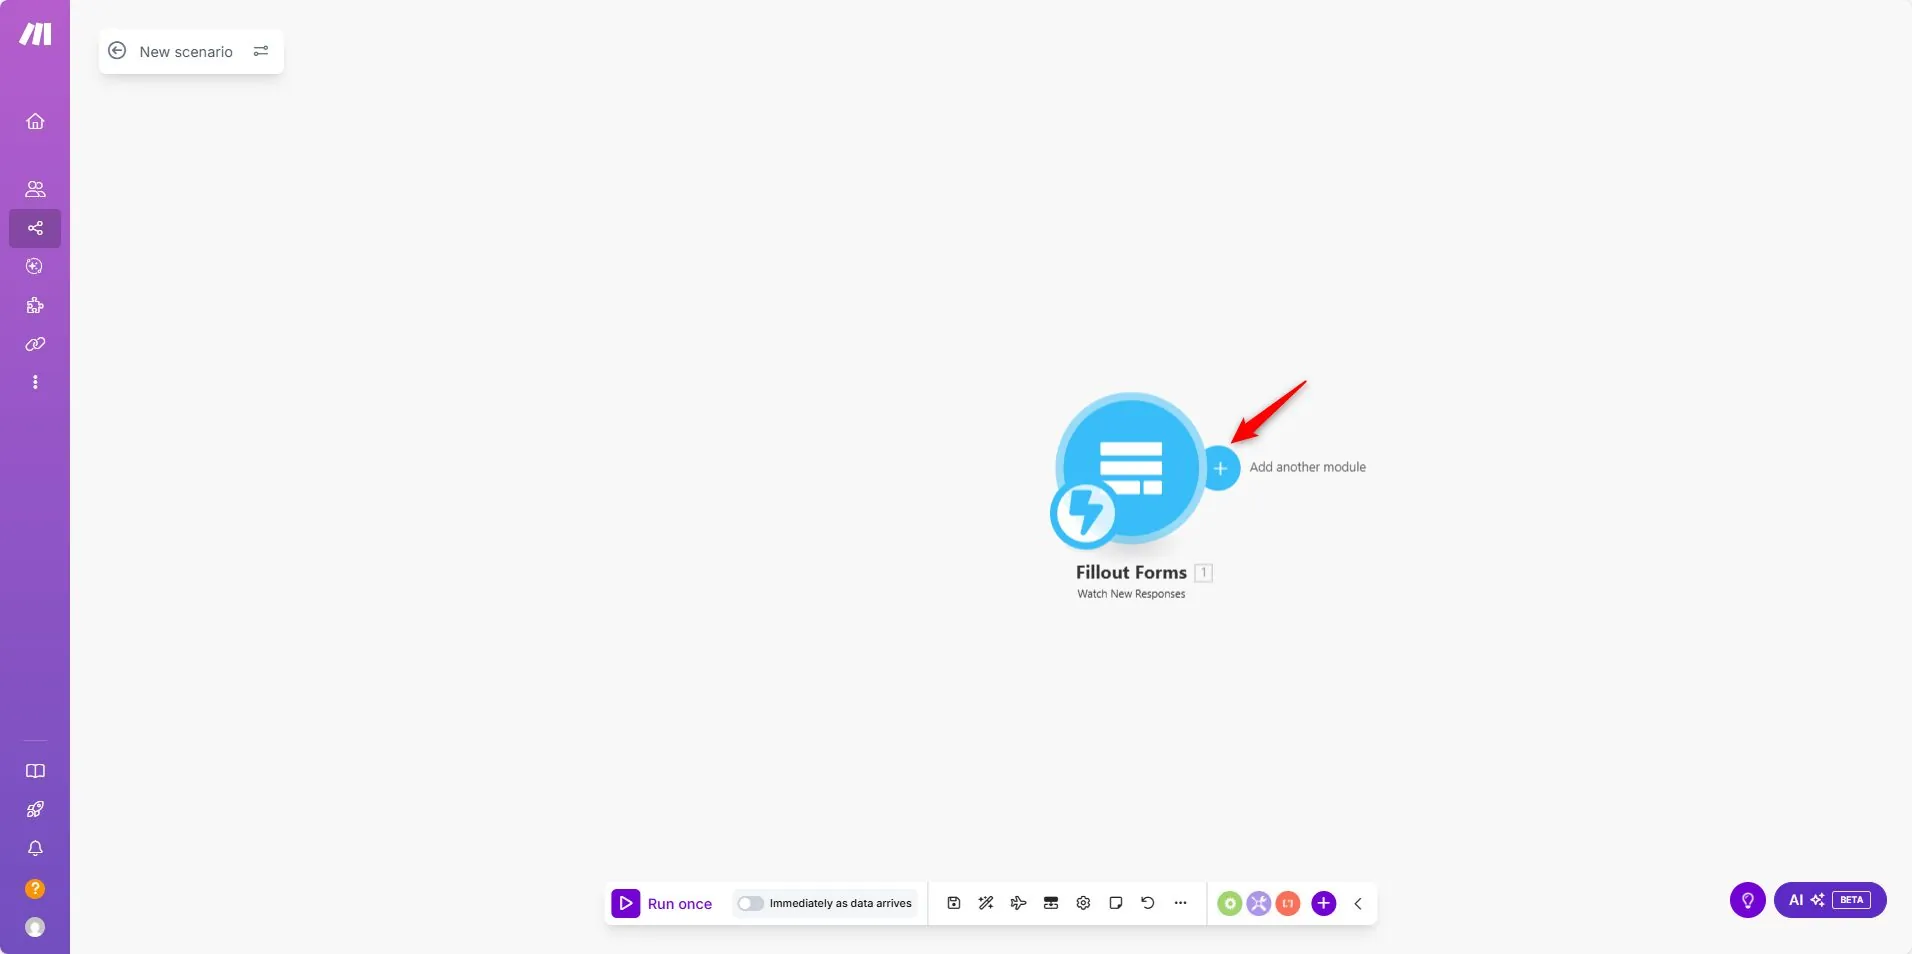
  1. Click on the + icon to add another module.
    Make.com plus icon to add a second module after Fillout

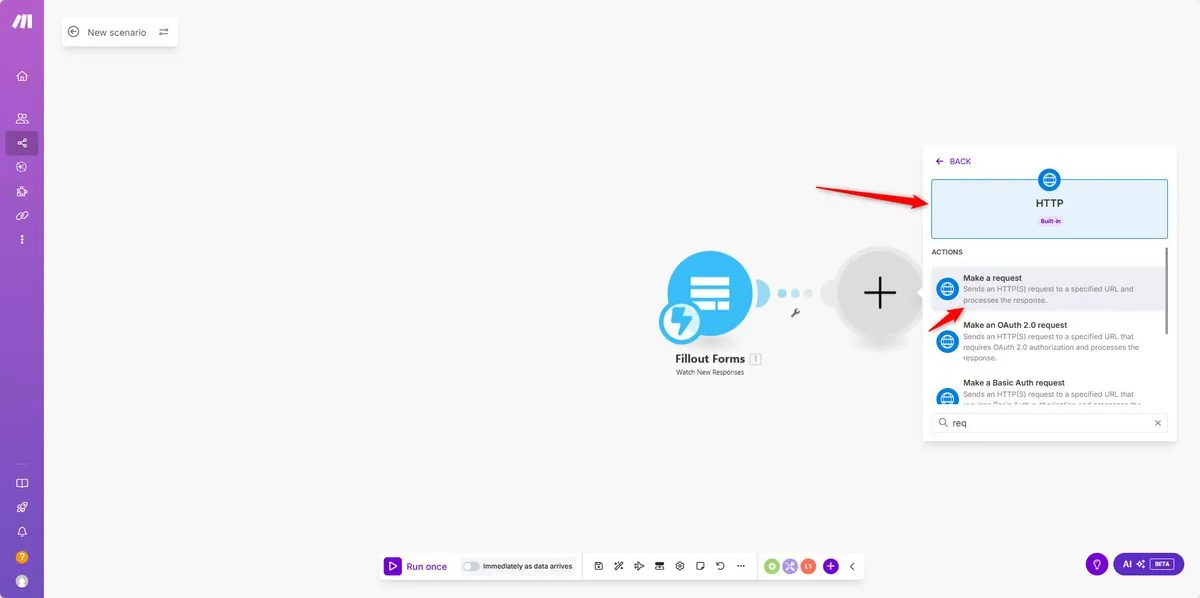
  2. Select HTTP → Make a Request.
    Make.com module picker selecting HTTP Make a Request action

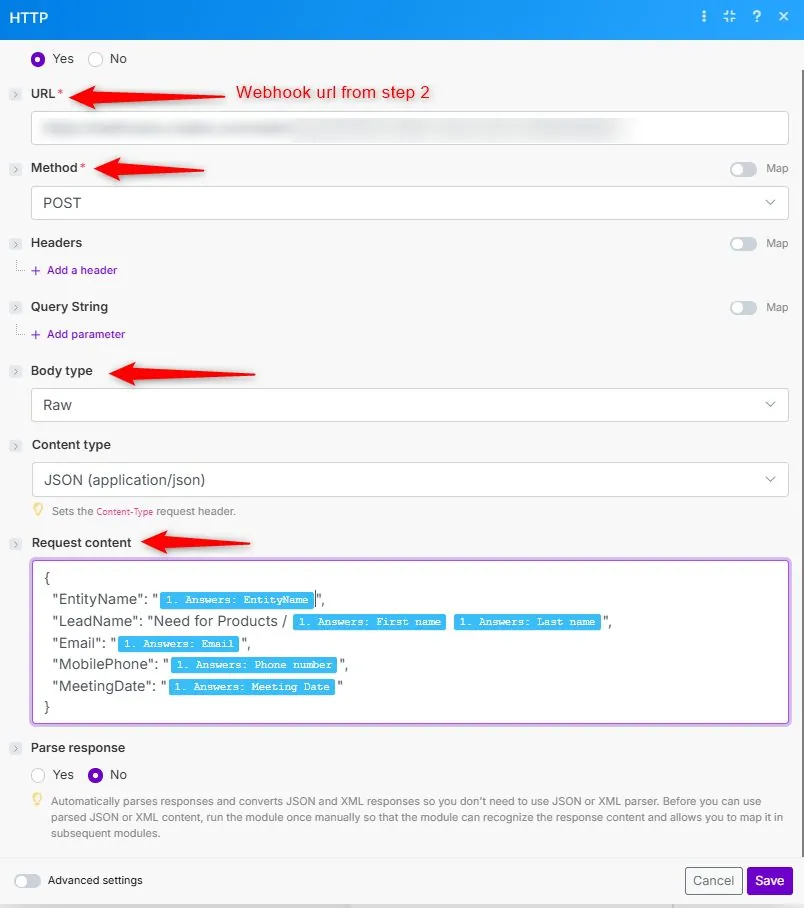
Configure the request:

  • URL: Creatio webhook URL
  • Method: POST
  • Body type: Raw
  • Content type: JSON

Sample JSON body:

{
  "EntityName": "{{1.answers.`6jAJ`}}",
  "LeadName": "Need for Products /  {{1.answers.vBDM}} {{1.answers.gtAY}}",
  "Email": "{{1.answers.rZAp}}",
  "MobilePhone": "{{1.answers.`8YFi`}}",
  "MeetingDate": "{{1.answers.kdaU}}"
}

d. Field Descriptions#

  • EntityName: specifies the Creatio object to create. Example: "Lead" (hidden field in Fillout).
  • LeadName: Lead name (example: "Need for product / FirstName LastName").
  • Email: Email address.
  • MobilePhone: Phone number.
  • MeetingDate: Meeting date.
    Make HTTP module configured with Creatio webhook URL and JSON body

E. Testing the Scenario#

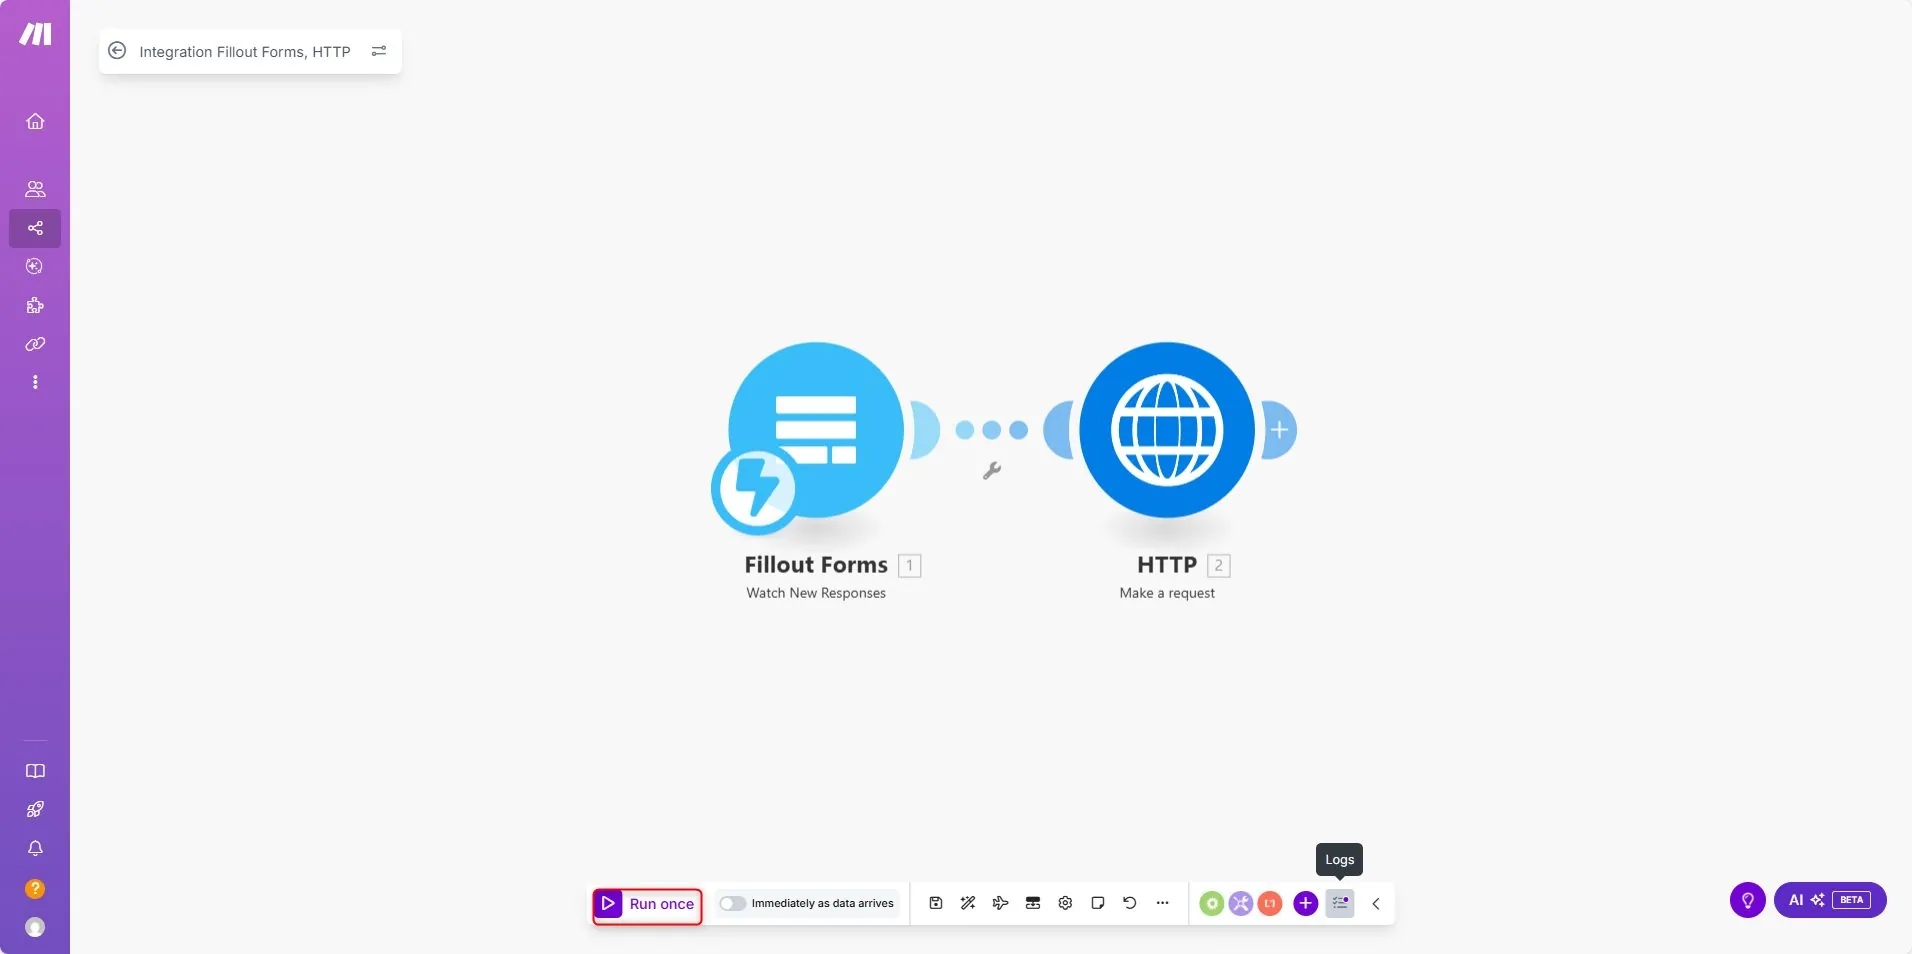
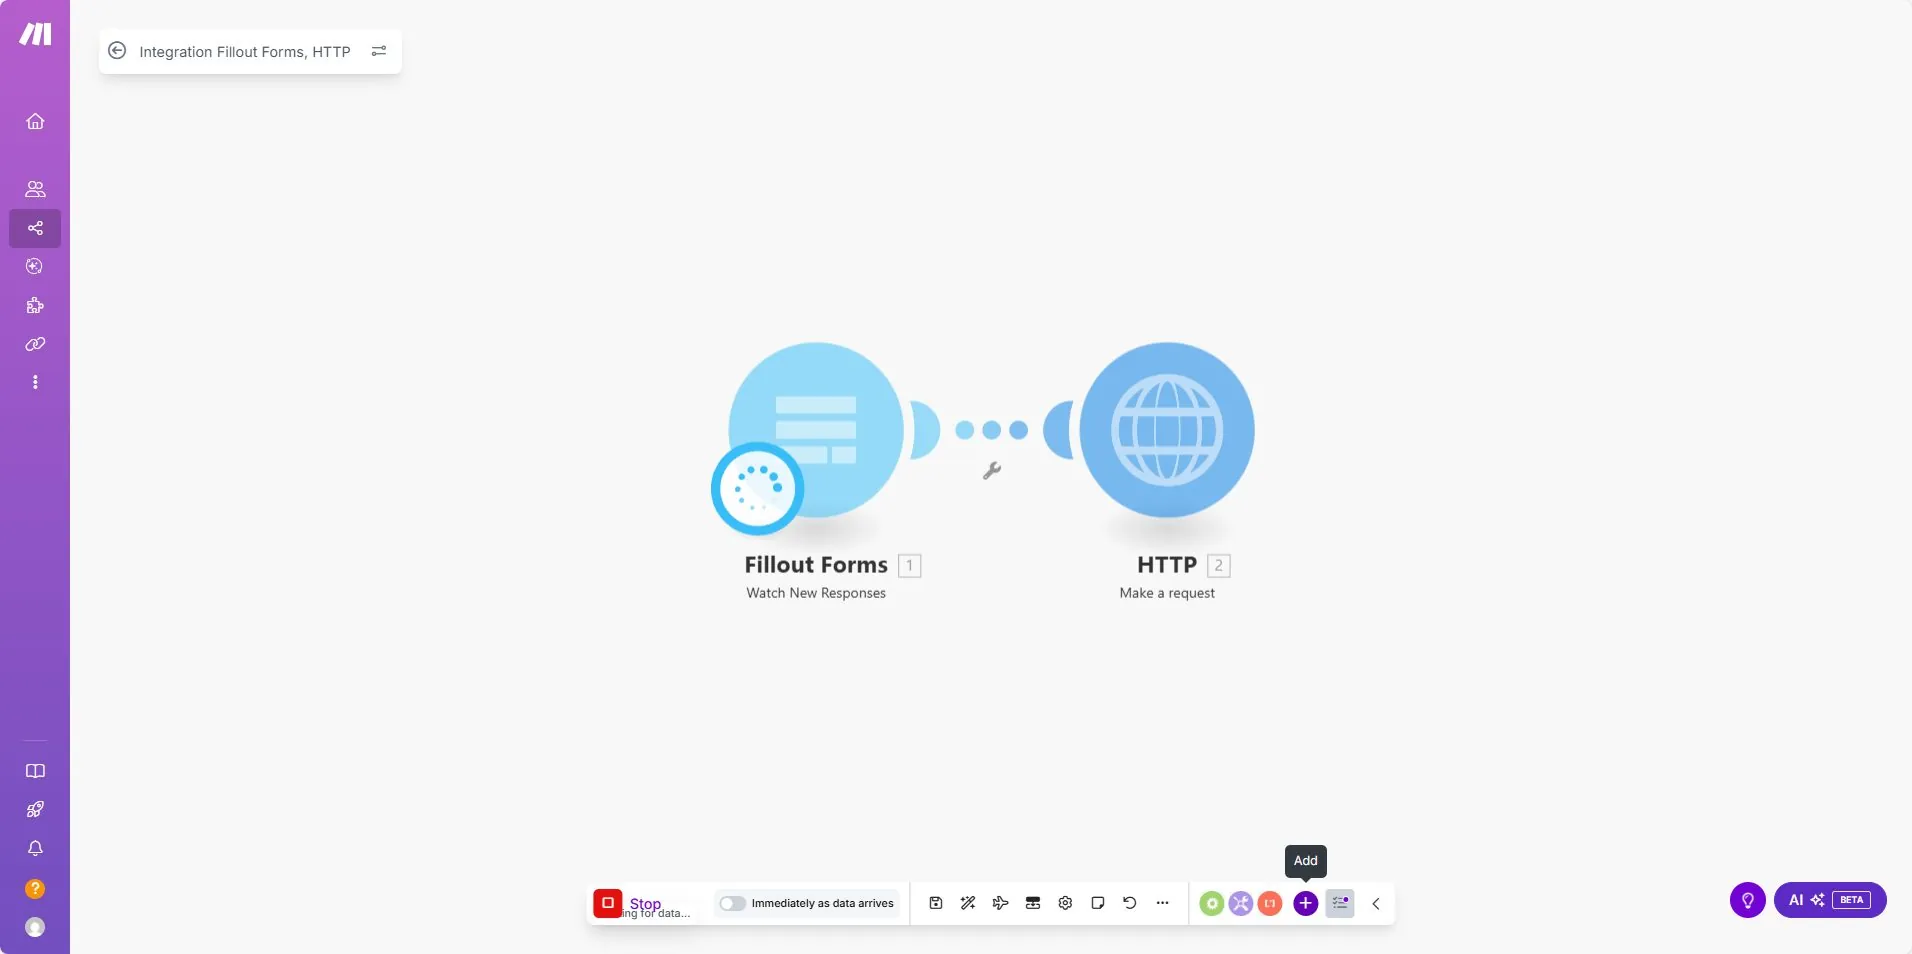
  1. In Make, click Run Once.
    Make.com Run Once button to start a one-time test Make.com scenario waiting for incoming Fillout test submission

  2. Submit a test entry in your Fillout form.

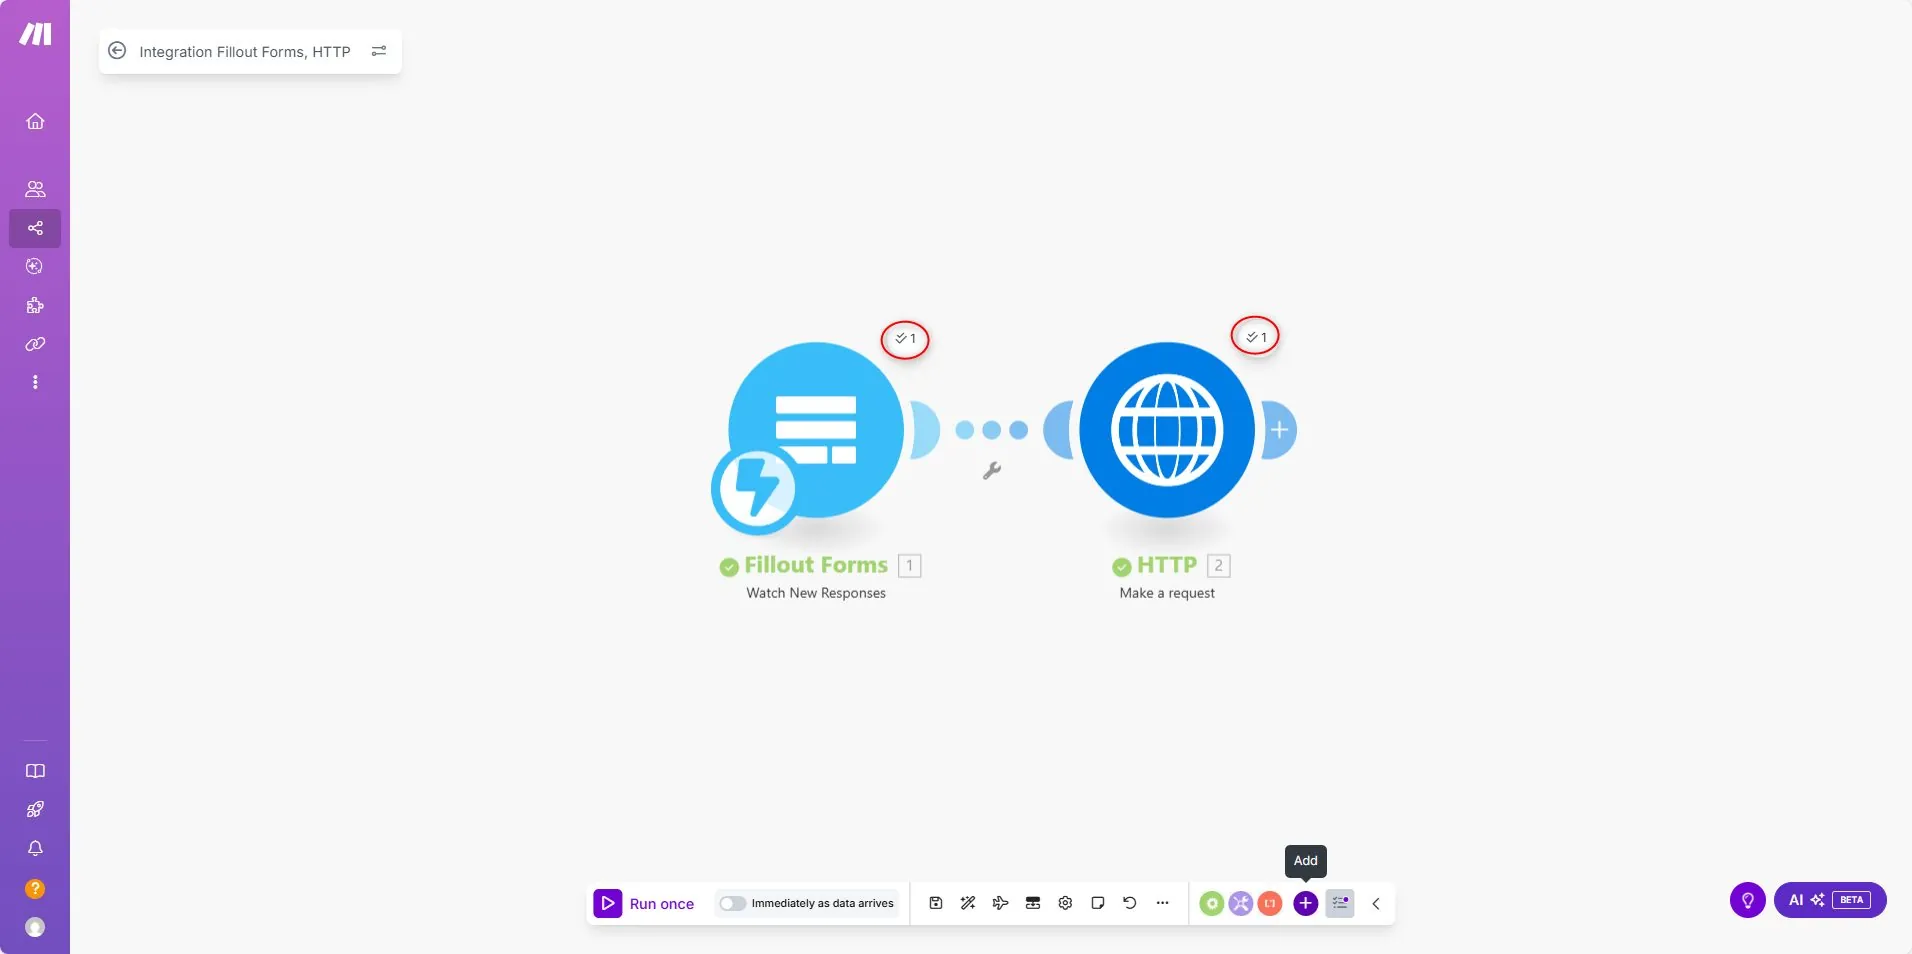
  3. If successful:

    • The scenario will stop.
    • A ✅ checkmark will appear on both Fillout and Creatio modules.
    • You can now activate your scenario.
      Make.com test run with checkmarks on Fillout and HTTP modules

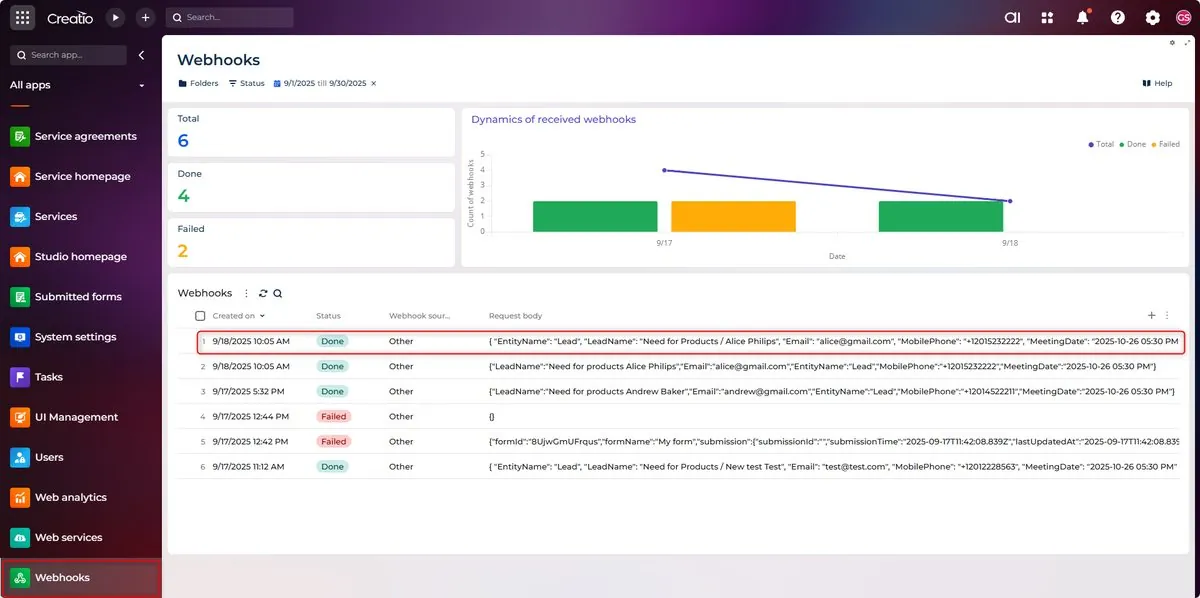
Verify Results in Creatio#

Check if the request is successfully received in Creatio.
Creatio webhook request log confirming submission received from Make

A new Lead record will appear automatically.
New Creatio Lead record created from Make scenario test submission


F. Activate the Scenario#

  1. Go back to your scenario diagram in Make.
  2. Toggle the scenario switch to On.
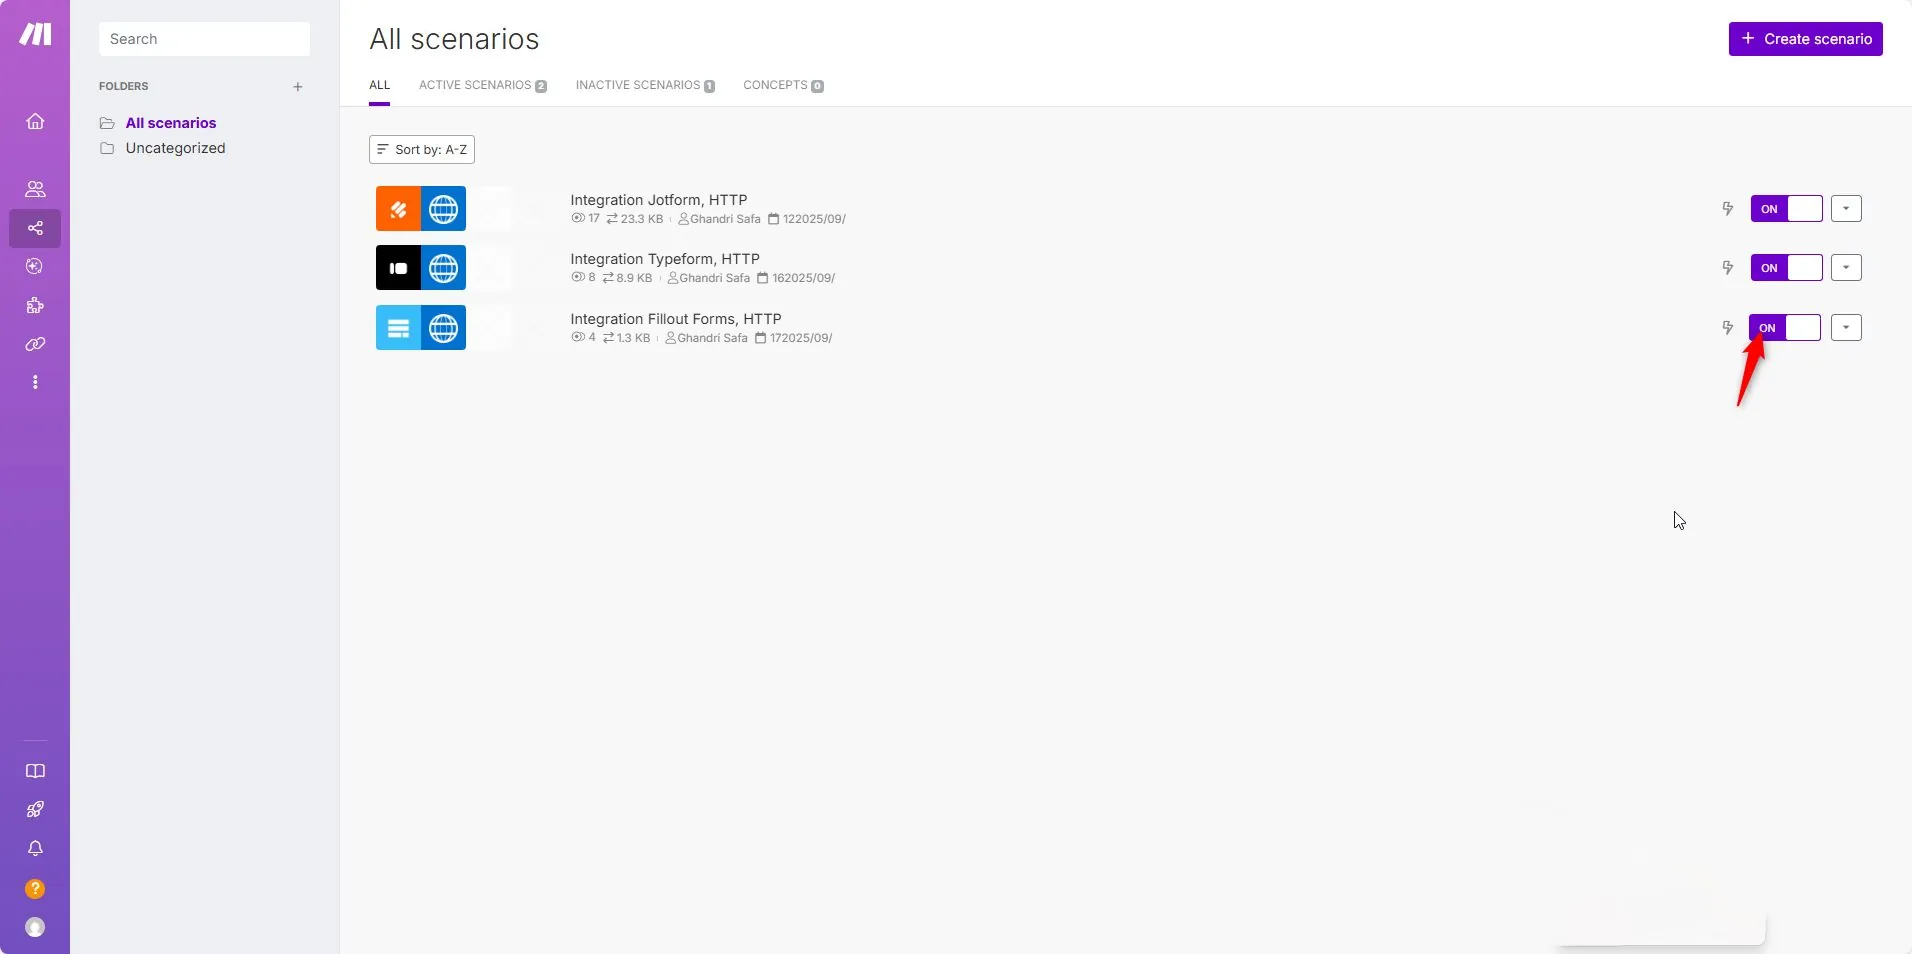
    From now on, every new Fillout form response will be automatically sent to Creatio.
    Make.com scenario activation toggle switched On for live runs

Conclusion#

By integrating Fillout with Creatio CRM, you can fully automate the flow of data from web forms into your CRM.

Depending on your needs, you can:

  • Use a direct webhook for a simple, fast setup.
  • Use Make.com for advanced workflows with mapping, error handling, and additional logic.

Benefits of this integration:

  • Eliminates manual data entry
  • Reduces human error
  • Ensures real-time updates in Creatio
  • Improves lead response time and customer experience

Next Steps#

To enhance your integration further, consider:

  1. Adding data validation rules in Make.
  2. Setting up error handling for failed submissions.
  3. Creating custom fields in Creatio for additional form data.
  4. Implementing lead scoring based on form responses.
  5. Setting up automated follow-up processes in Creatio.

FAQ: Fillout → Creatio Integration#

Can I create objects other than Leads?#

Yes. Set the hidden EntityName field (e.g. Contact, Case). Ensure the webhook body includes columns valid for that object.

How do I prevent duplicate Leads?#

Use Make.com: first call Creatio OData/REST (Find by Email), branch logic: update if found, create if not.

Can I send attachments from Fillout to Creatio?#

Direct webhook cannot store binaries. Use Make.com to download the file URL then upload via Creatio file API.

Is authentication required for the Creatio webhook?#

Creatio’s generated form/webhook endpoint is public for submission. For stricter security, proxy through Make or add a verification token field.

How do I map multi-select fields?#

Loop (Iterator) in Make.com, transform values to Creatio lookup IDs, then aggregate into the request body if the target field supports multiple values.

Why are some form submissions not appearing?#

Check: (1) Scenario activated, (2) Webhook URL unchanged, (3) Required columns exist in Creatio, (4) JSON keys match column codes.

Need a custom Creatio integration?

Thirty minutes with Mohamed, who founded the company and still runs these calls himself. He will sketch your situation and tell you the cleanest path, including the times when that path is not us.
creatio fillout integration webhook make.com automation