Jotform → Creatio integration goes through Make.com, because Jotform doesn’t expose a direct Creatio-compatible webhook, so Make sits in between as the receiver. The setup also requires generating a Jotform API key with the right regional domain if your account is on EU, HIPAA, or Enterprise infrastructure. This guide walks the entire flow end-to-end, including the date/time concatenation pattern that trips up most first-time integrators.
Using a different form tool? Fillout → Creatio (supports a direct webhook, no Make.com needed) · Typeform → Creatio (Make.com path with UUID field mapping)
Steps at a glance#
- Create your Jotform and generate an API key
- Copy the Creatio Lead Webhook URL
- In Make: add Jotform “Watch for Submissions”
- Add HTTP module: POST to Creatio webhook
- Map fields and format date/time
- Run a test and activate the scenario
Who this guide is for (Creatio no-code builders)#
- Creatio citizen developers and no-code creators
- Teams who want to auto-create Leads in Creatio from Jotform without custom code
- Admins who prefer Make.com scenarios over custom REST/OData scripts
What you’ll achieve#
- Auto-create Leads (or Contacts/Cases) in Creatio from any Jotform
- Map Jotform fields to Creatio columns without code
- See every submission in Make’s execution log, so a failed handoff is visible instead of silent
Video Tutorial#
Watch this step-by-step video guide to see the entire integration process in action:
1. Set up the Jotform account#
Create and Configure Your Form#
a. Create an account at Jotform.
b. Build your form with all the required fields (Lead Name, Email, Phone, etc.).
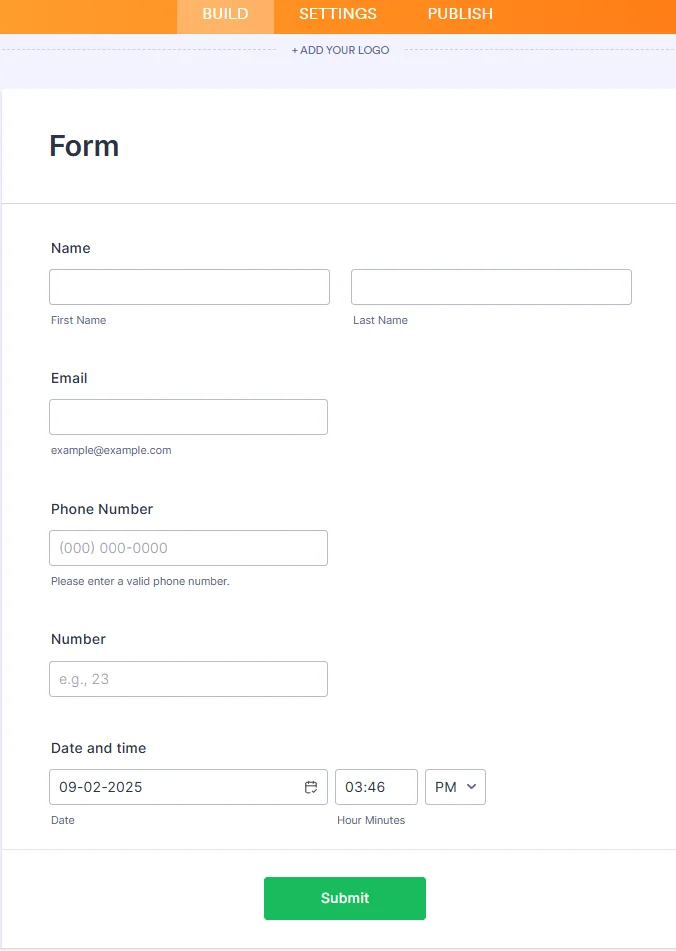
Get Your API Key#
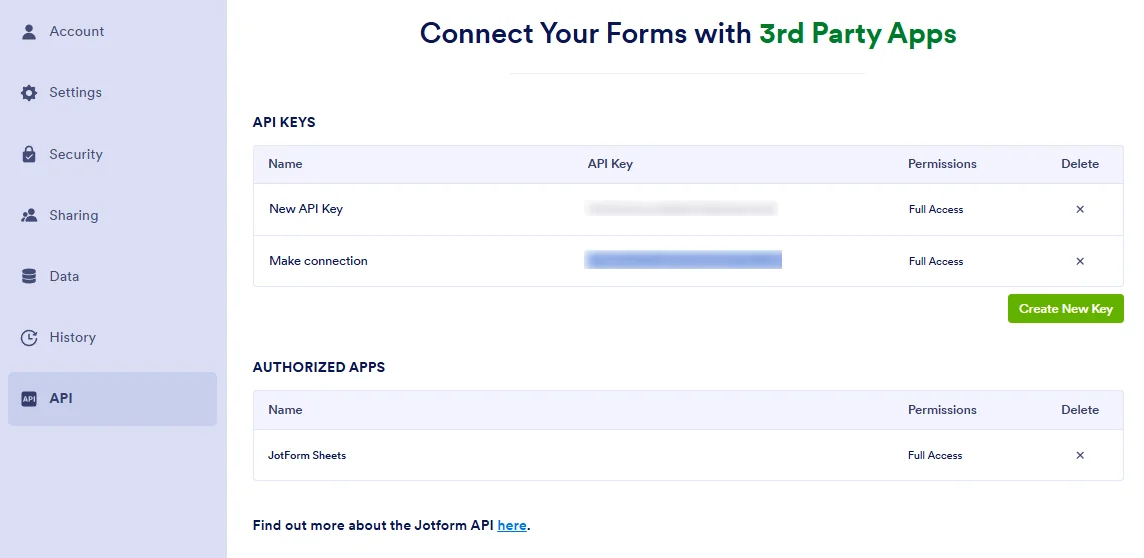
c. Get your API key:
- Go to Account Settings → API
- Generate a key with Full Access
This API key will later be used to connect Jotform with Make.

2. Get the webhook URL from Creatio#
To connect Creatio with Make, you need to obtain the Webhook URL that will receive Jotform submissions.
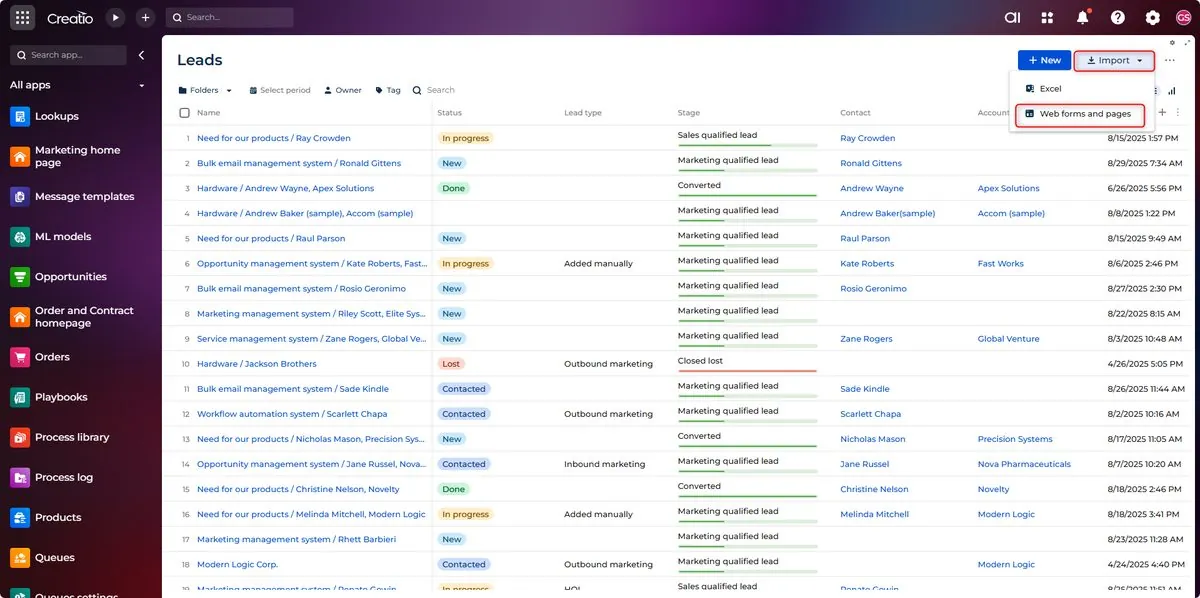
- Go to the Lead section in Creatio.
- In the top menu, click Import.
- From the dropdown, select Web forms and pages.
- A list of web form integration options will open.
- Click Get your webhook URL.
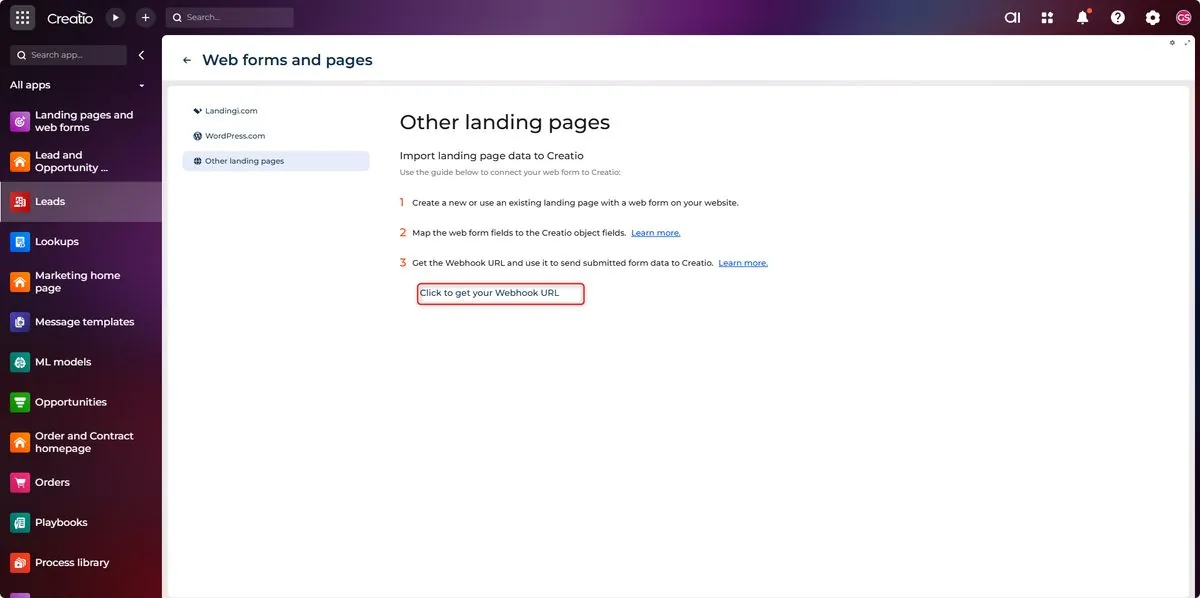
- Copy the generated Webhook URL; you’ll use this in your Make scenario.
3. Set up the Make account#
Create Your Automation Scenario#
a. Create a Make account at Make.
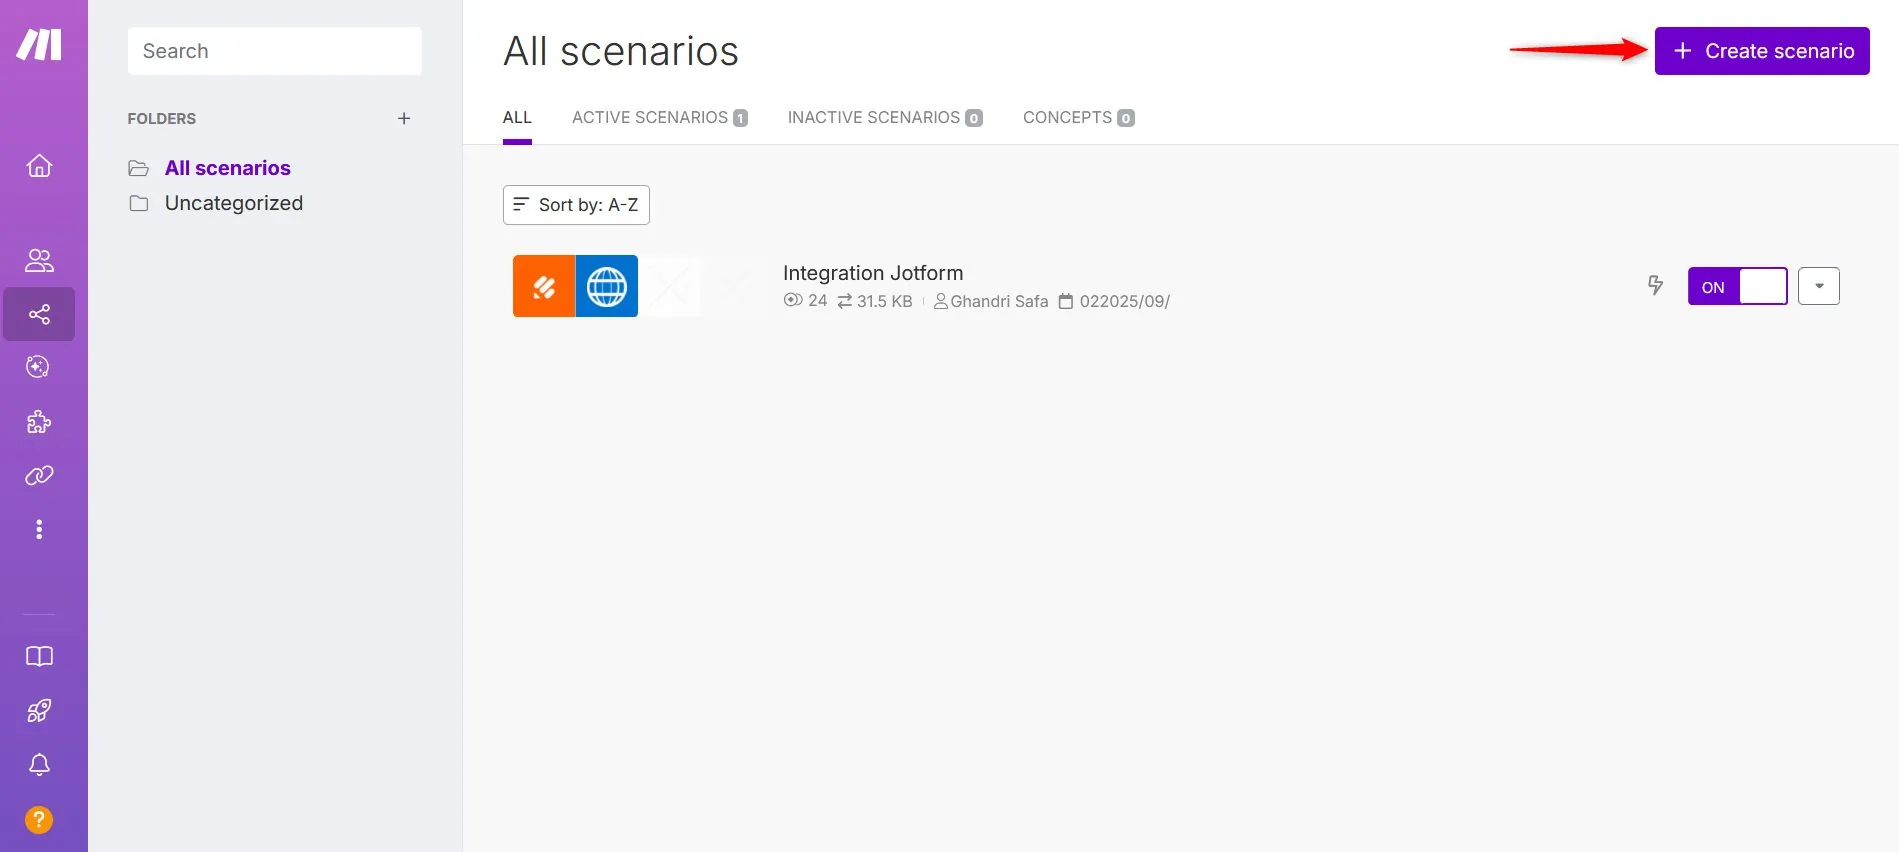
b. Create a New Scenario: In Make, scenarios define the automation workflows.
- Open Scenarios → Create a New Scenario.
Configure Jotform Module#
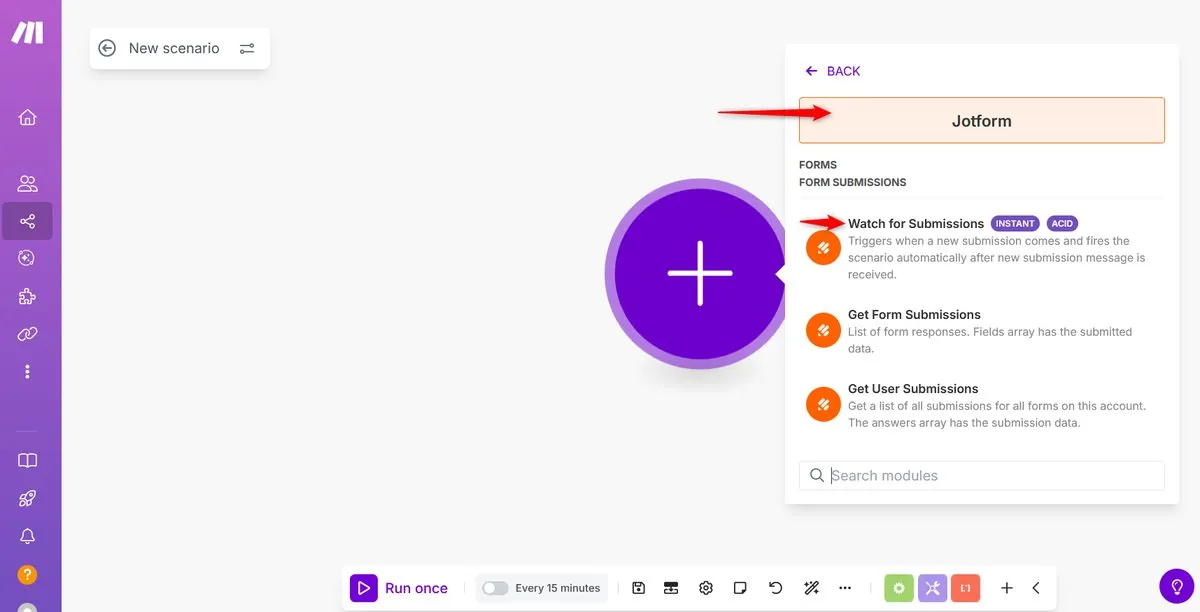
Add your first module: Jotform → Watch for Submissions
- Click the plus icon in the blank canvas to select your app.
- Search for and click Jotform.
- Select Watch for Submissions under Form Submissions.
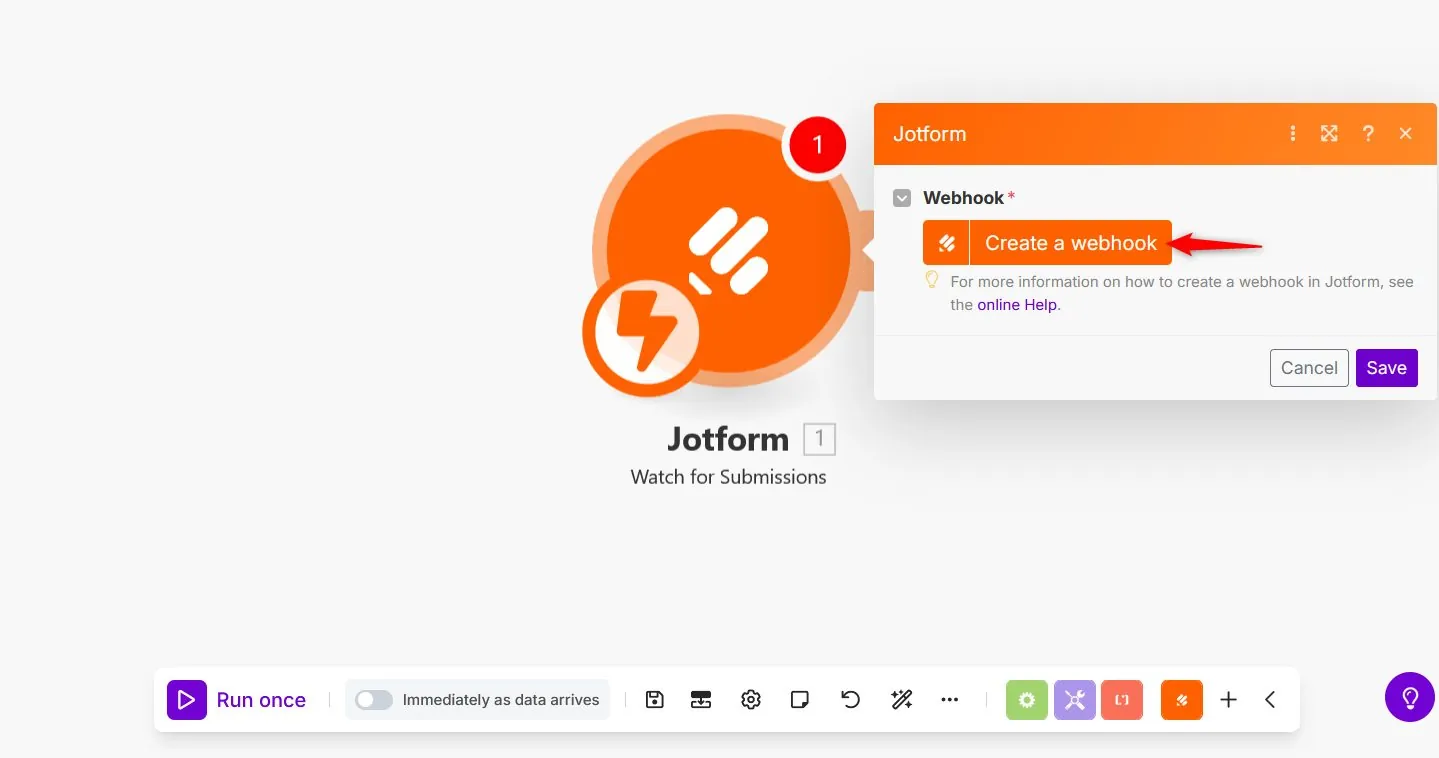
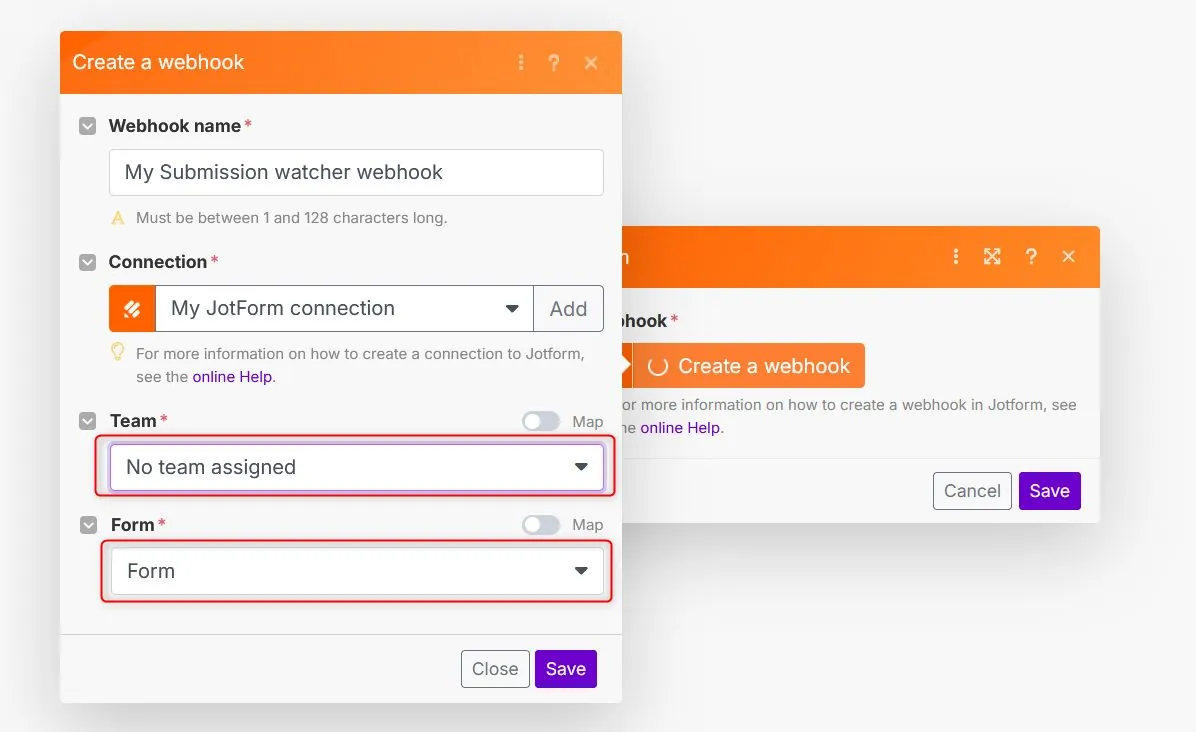
- Click the Create Webhook button.
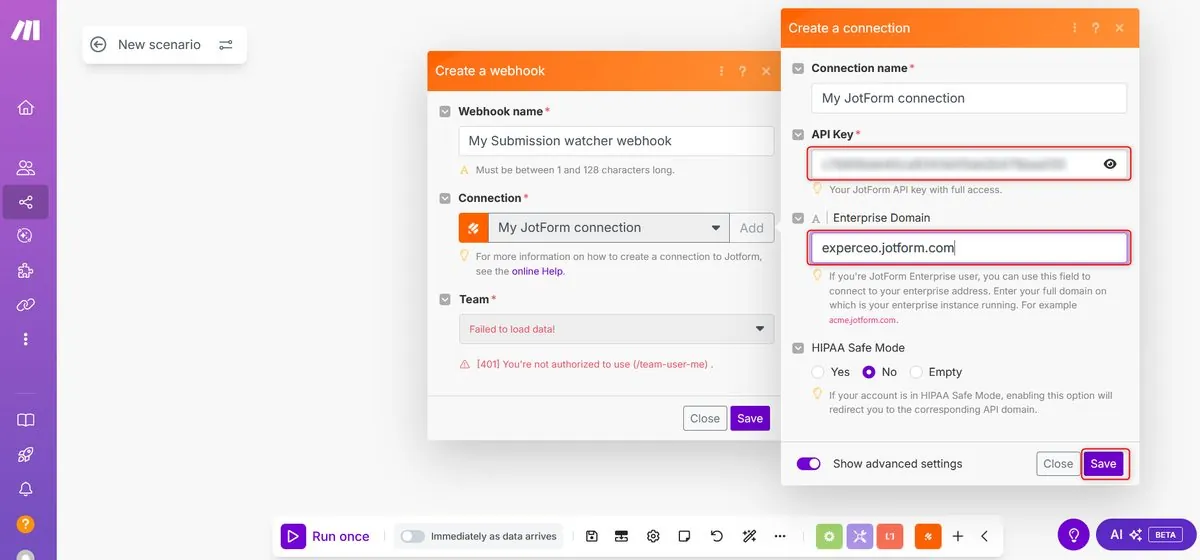
- Configure the following:
- Webhook Name: custom name
- Connection: connect your Jotform account
- Connection Name: personalize if multiple accounts
- API Key: paste the key generated earlier
Note: If you are an EU, HIPAA, or Enterprise Jotform user, toggle Show advanced settings and configure your domain.
- Select the Form that will trigger the scenario.
Click the Save button to save your connection settings with Jotform.
At this step, you must set up the following:
- Team: If the form you’re going to select isn’t in the team, choose No team assigned from the dropdown.
- Form: Select the form that will act as the trigger for your scenario.
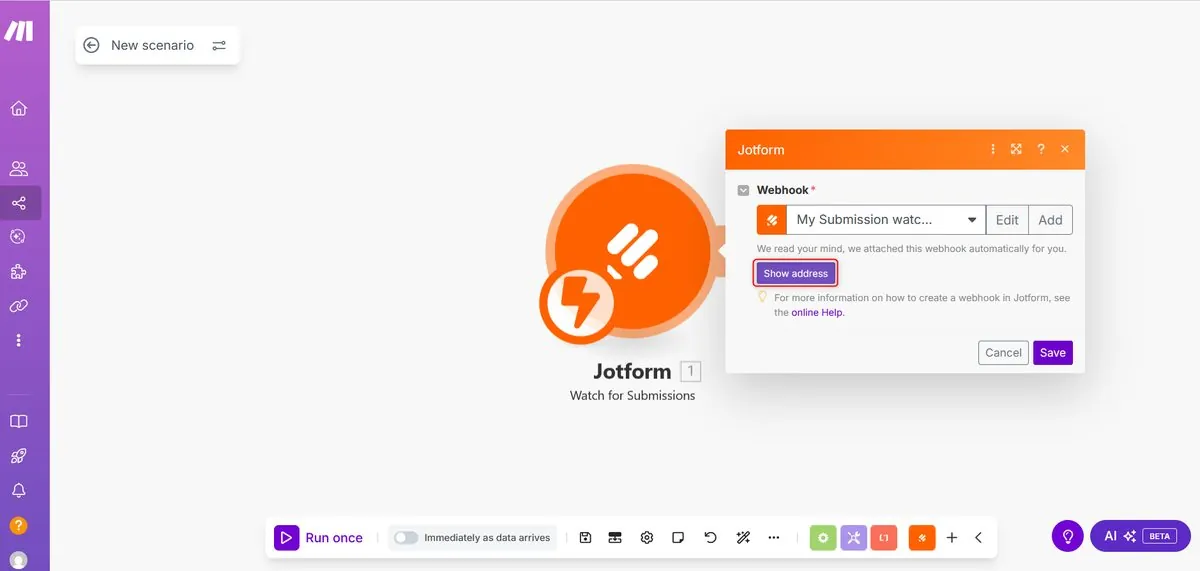
Make will automatically generate a webhook for Jotform.
Connect Make to Creatio: Add the second module#
After Jotform is connected:
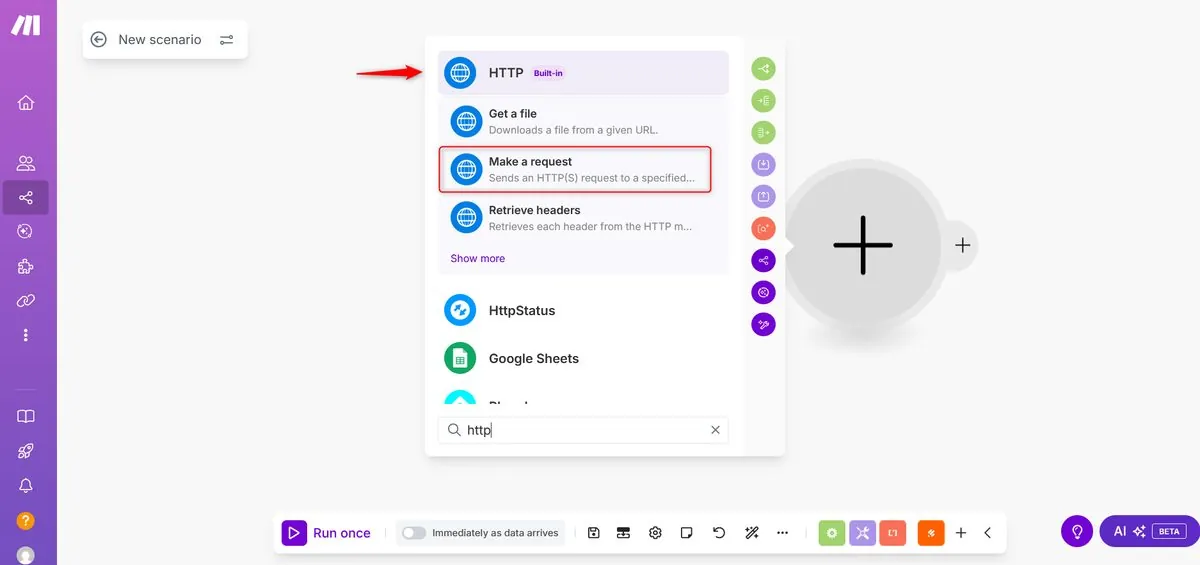
- Click Add another module.
- Select HTTP → Make a Request.
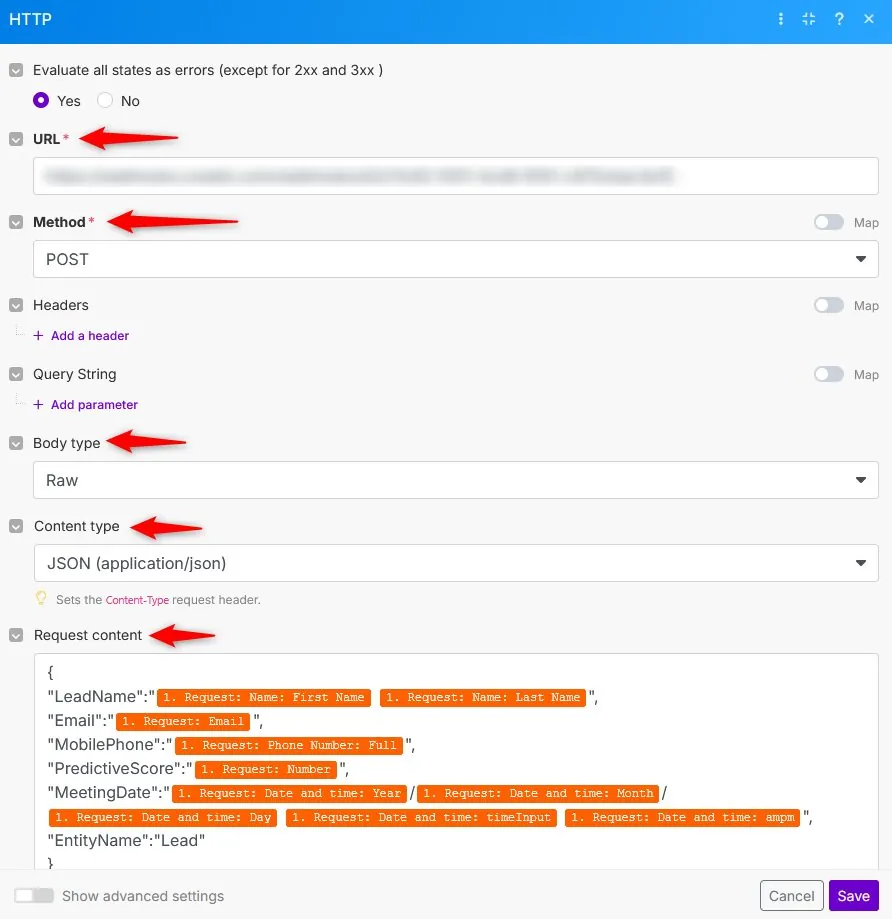
Configure the request:
- URL: Creatio webhook URL
- Method: POST
- Body type: Raw
- Content type: JSON
Request Content Example:
{
  "LeadName": "{{1.request.q3_name.first}} {{1.request.q3_name.last}}",
  "Email": "{{1.request.q4_email}}",
  "MobilePhone": "{{1.request.q5_phoneNumber.full}}",
  "PredictiveScore": "{{1.request.q7_number}}",
  "MeetingDate": "{{1.request.q9_date.year}}/{{1.request.q9_date.month}}/{{1.request.q9_date.day}} {{1.request.q9_date.timeInput}} {{1.request.q9_date.ampm}}",
  "EntityName": "Lead"
}
Field Descriptions#
Out of the box, Creatio attempts to parse the webhook of an identified structure to add a record. The webhook must contain the following parameters:
- EntityName: specifies the code of a Creatio object to add a record. Example:
"Lead". - Object column codes: must match Creatio fields. Example:
LeadName→ Full nameEmail→ EmailMobilePhone→ PhonePredictiveScore→ Number
Finally, click the OK button to save.
4. Testing the Scenario#
Now that both Jotform and the Creatio app are connected, it’s time to test your scenario:
- Click the Run Once button in your Make scenario flow.
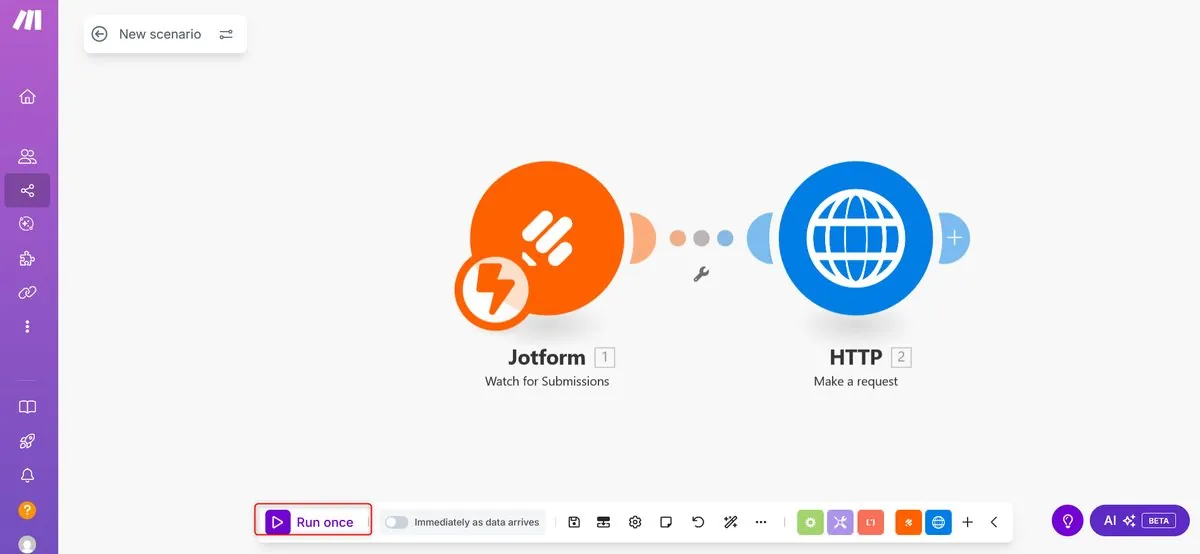
Submit a test entry in your Jotform.
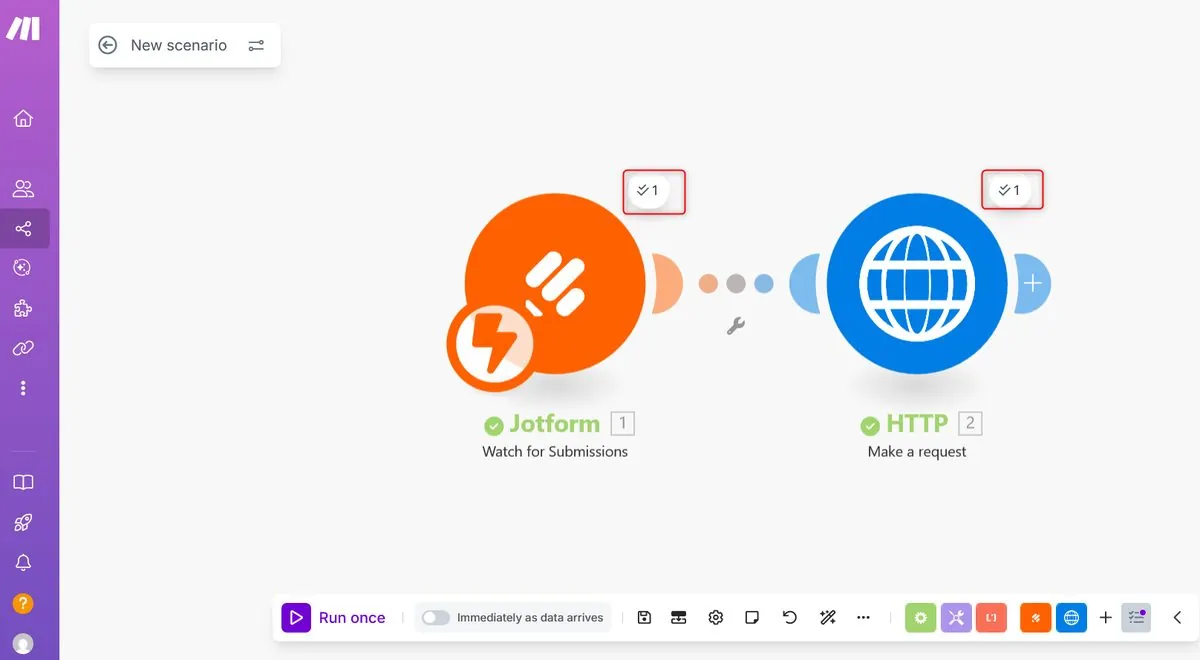
When the test runs successfully:
- The scenario will stop.
- You will see a checkmark on both Jotform and Creatio modules.
- You’re now ready to activate your scenario.
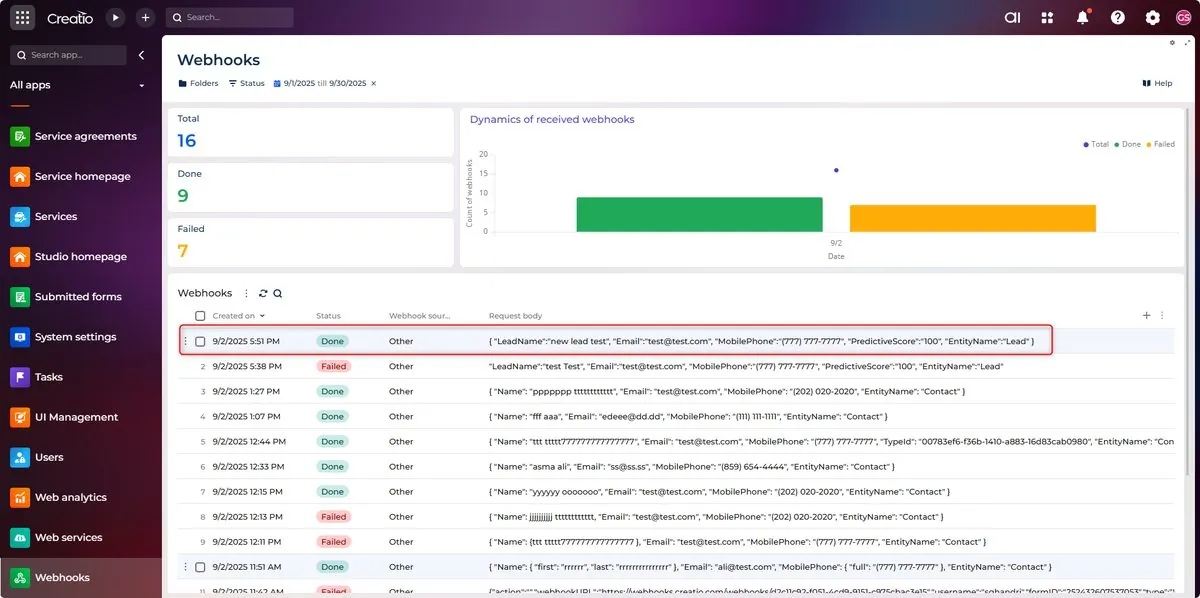
Verify Results in Creatio#
Check if the request is successfully received in Creatio.
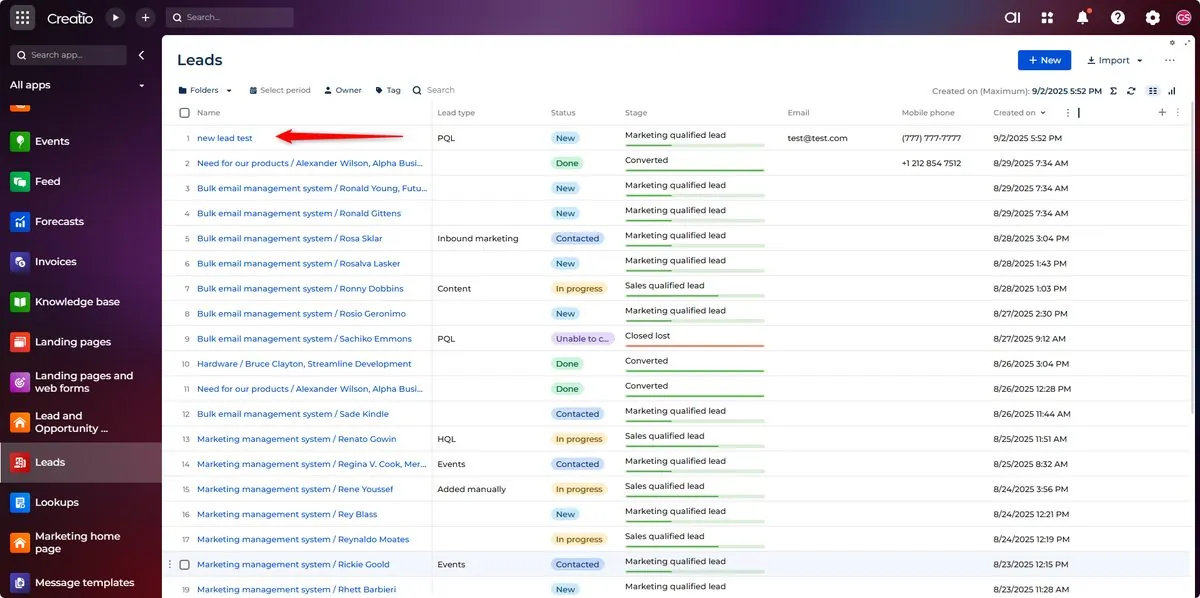
If successful, you’ll see a new Lead record created automatically in Creatio CRM.
5. Activate the Scenario#
- Go back to your scenario diagram in Make.
- Toggle the On/Off switch to On.
From now on, every new Jotform submission will be sent automatically to Creatio.
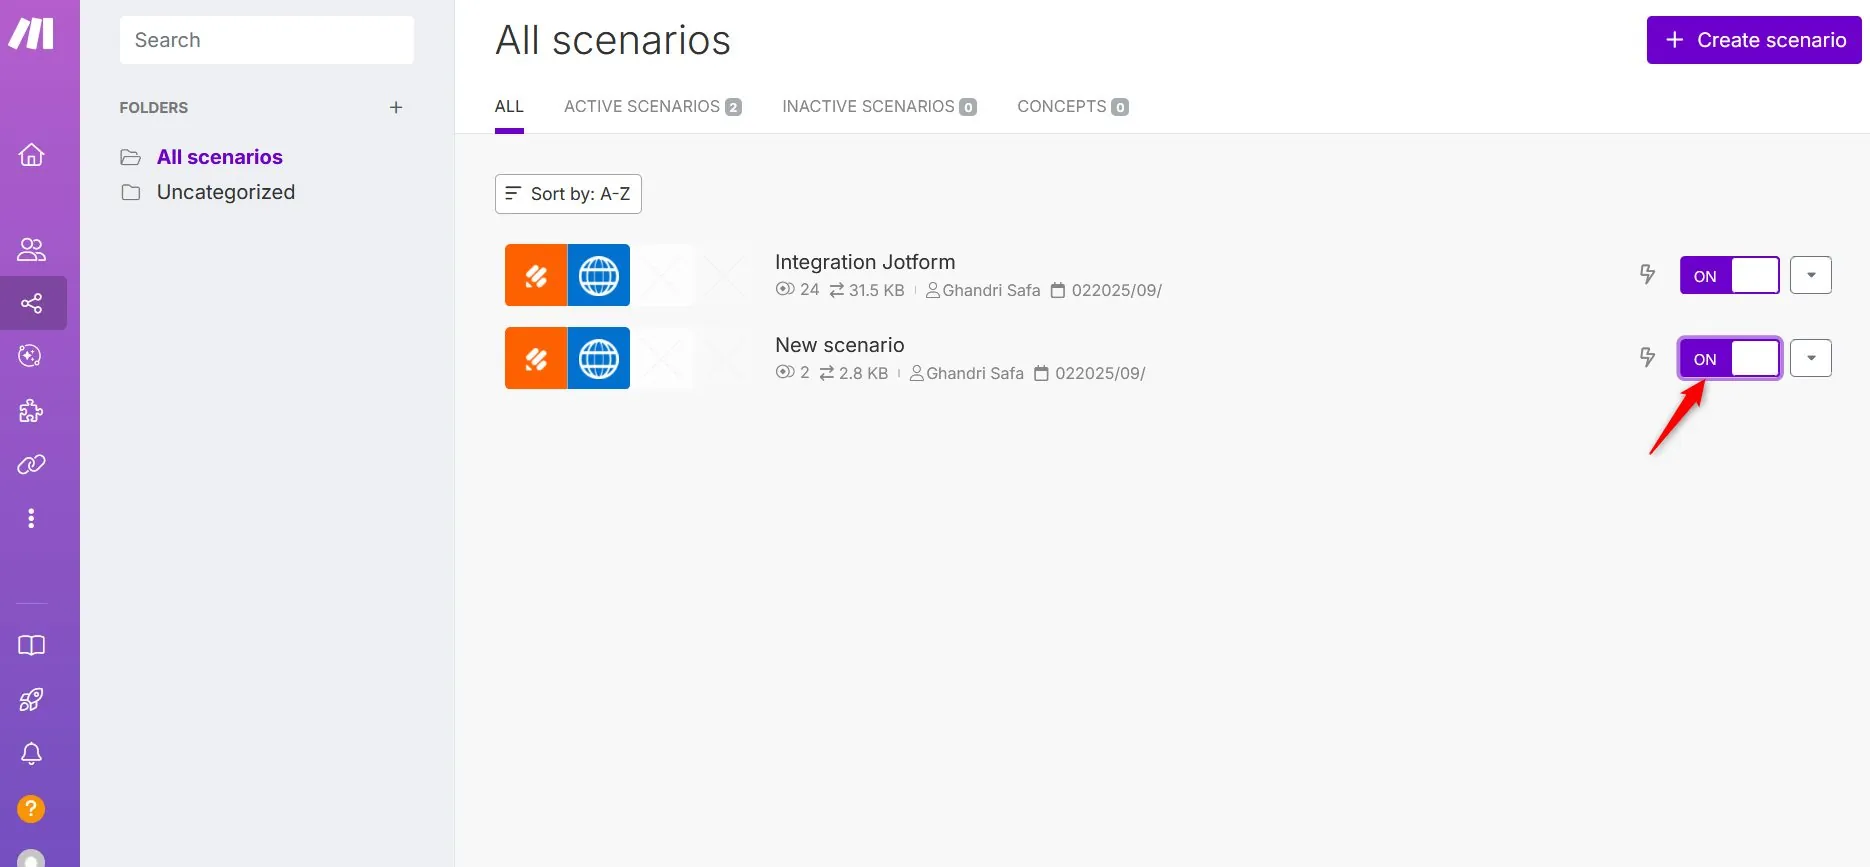
After activation, every new submission instantly creates a record (Lead, Contact, Case, etc., depending on your mapping) in Creatio CRM.
Conclusion#
Integrating Jotform with Creatio via Make provides numerous benefits:
- Automates data flow between systems
- Eliminates manual entry and reduces errors
- Ensures real-time updates in your CRM
- Improves lead response time and customer experience
Every form submission is automatically turned into actionable business insight in your Creatio CRM.
Next Steps#
To enhance your integration further, consider:
- Adding data validation rules in Make
- Setting up error handling for failed submissions
- Creating custom fields in Creatio for additional form data
- Implementing lead scoring based on form responses
- Setting up automated follow-up processes in Creatio
Pre-Built Marketplace Solutions#
For even easier implementation, check out our ready-to-use Creatio marketplace addons:
- Experceo Jotform Connector for Creatio - Native Jotform integration with pre-configured mappings and automated workflows
- Experceo Make.com Connector for Creatio - The official Make.com connector for Creatio, with error handling and execution monitoring built in
These addons provide plug-and-play functionality with advanced features like automated retry mechanisms, detailed logging, and visual workflow builders.
For more Creatio integration guides and development tips, explore the other guides on the blog.
Related Guides#
Troubleshooting (Quick Wins)#
- No Lead created: verify webhook URL +
EntityName="Lead". - 4xx/5xx errors: inspect Make module execution details.
- Date/time issues: format to ISO 8601 before POST.
- EU/HIPAA: set correct Jotform region domain.
FAQ: Jotform → Creatio Integration#
Can I enrich Lead data automatically?#
Yes. After the Jotform trigger, call an enrichment API and merge fields before sending to Creatio.
How do I map file uploads?#
Download file via its URL in Make, then upload to Creatio file endpoint with the created record ID.
Can I prevent duplicate records?#
Search by email first (REST/OData). If found: update; else: create.
Why are number fields stored as text?#
Remove quotes around numeric values or cast in Make before the POST.
Is the API key required for Creatio?#
Only for Jotform → Make authentication. Creatio webhook itself is public for submission.
How do I handle conditional optional fields?#
Use a router in Make and omit empty keys to avoid overwriting existing data.
Want this done for you?
Thirty minutes with Mohamed, who founded the company and still runs these calls himself. He will sketch your situation and tell you the cleanest path, including the times when that path is not us.